Learning Objectives:
• Familiarise yourself with the basic layout and functions of Photoshop
• Understand how images can be enhanced in a way that supports the painting process
• Experiment with selection tools, layer masks and contrast/colour adjustments
• Familiarise yourself with the basic layout and functions of Photoshop
• Understand how images can be enhanced in a way that supports the painting process
• Experiment with selection tools, layer masks and contrast/colour adjustments
Your task:
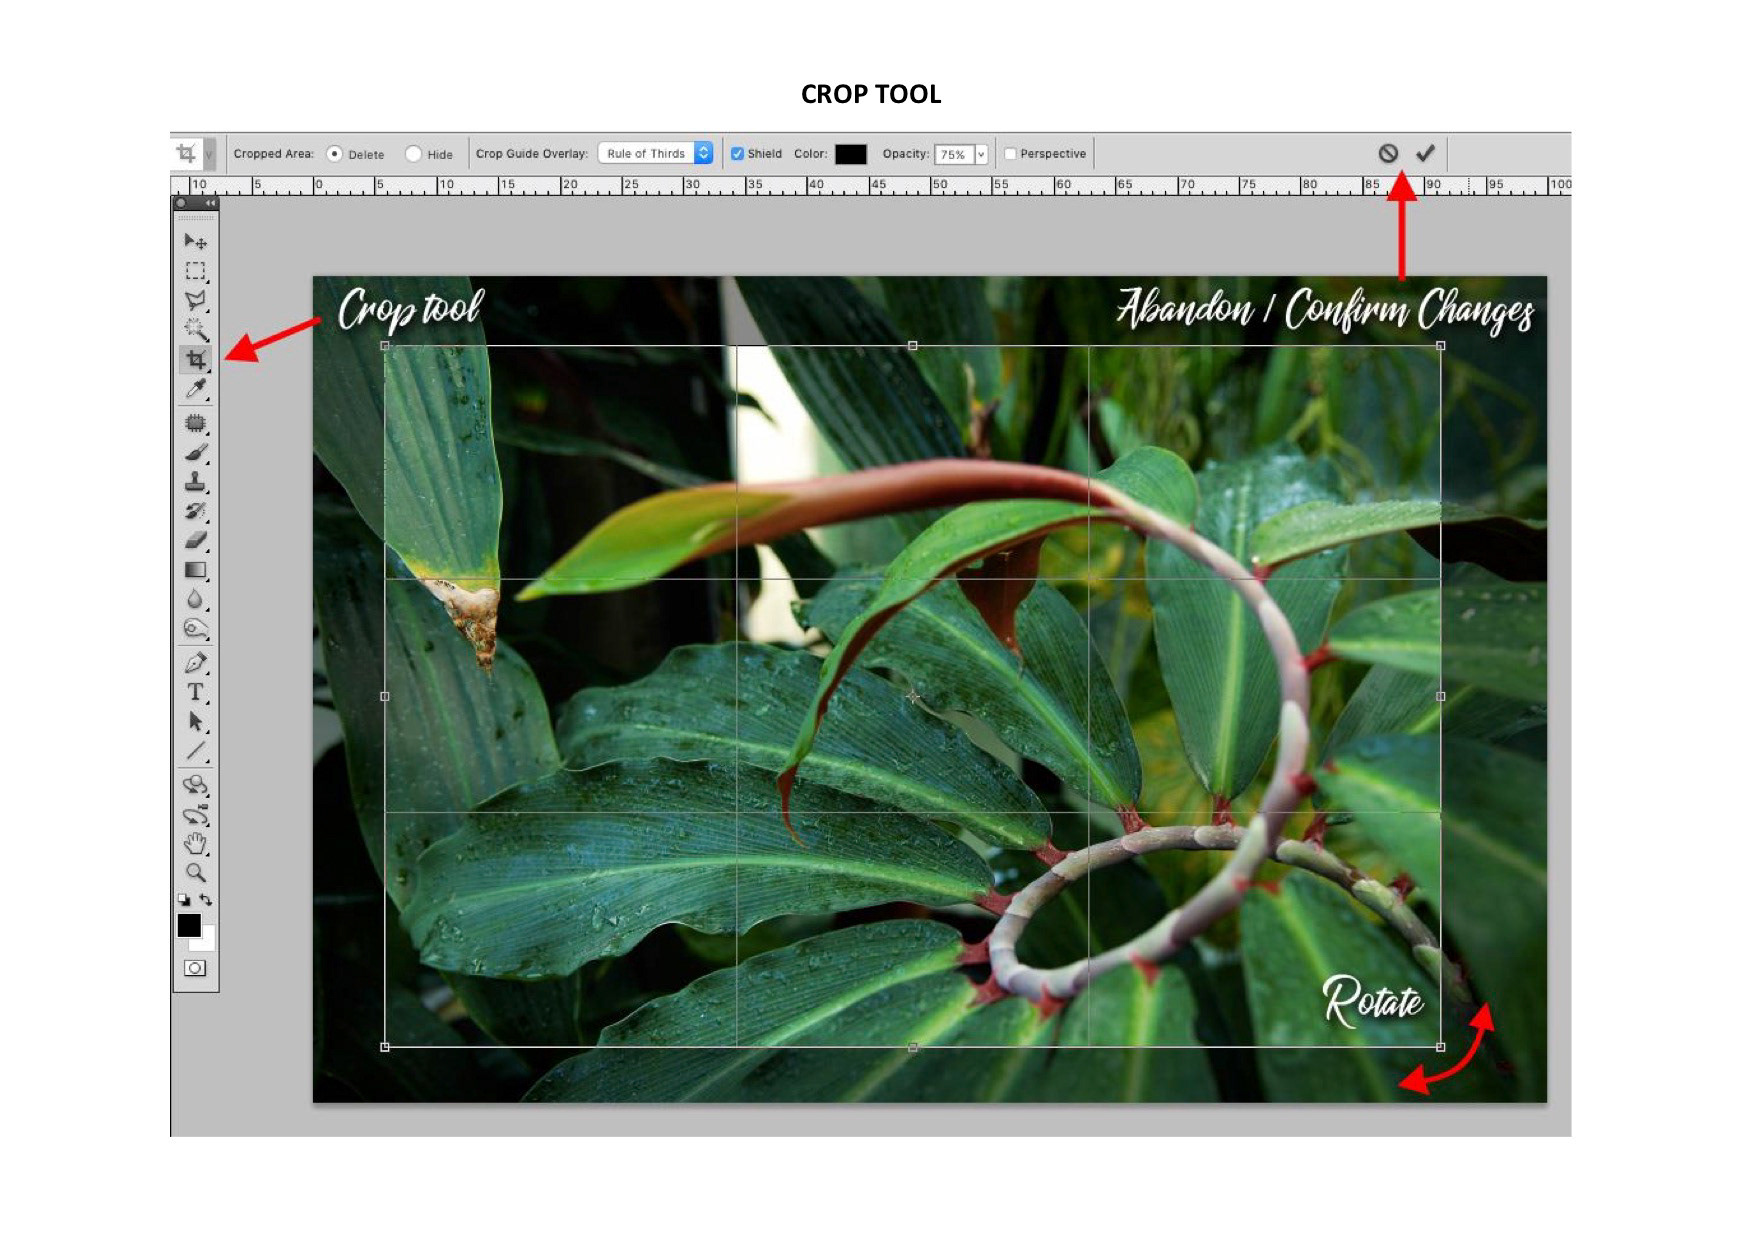
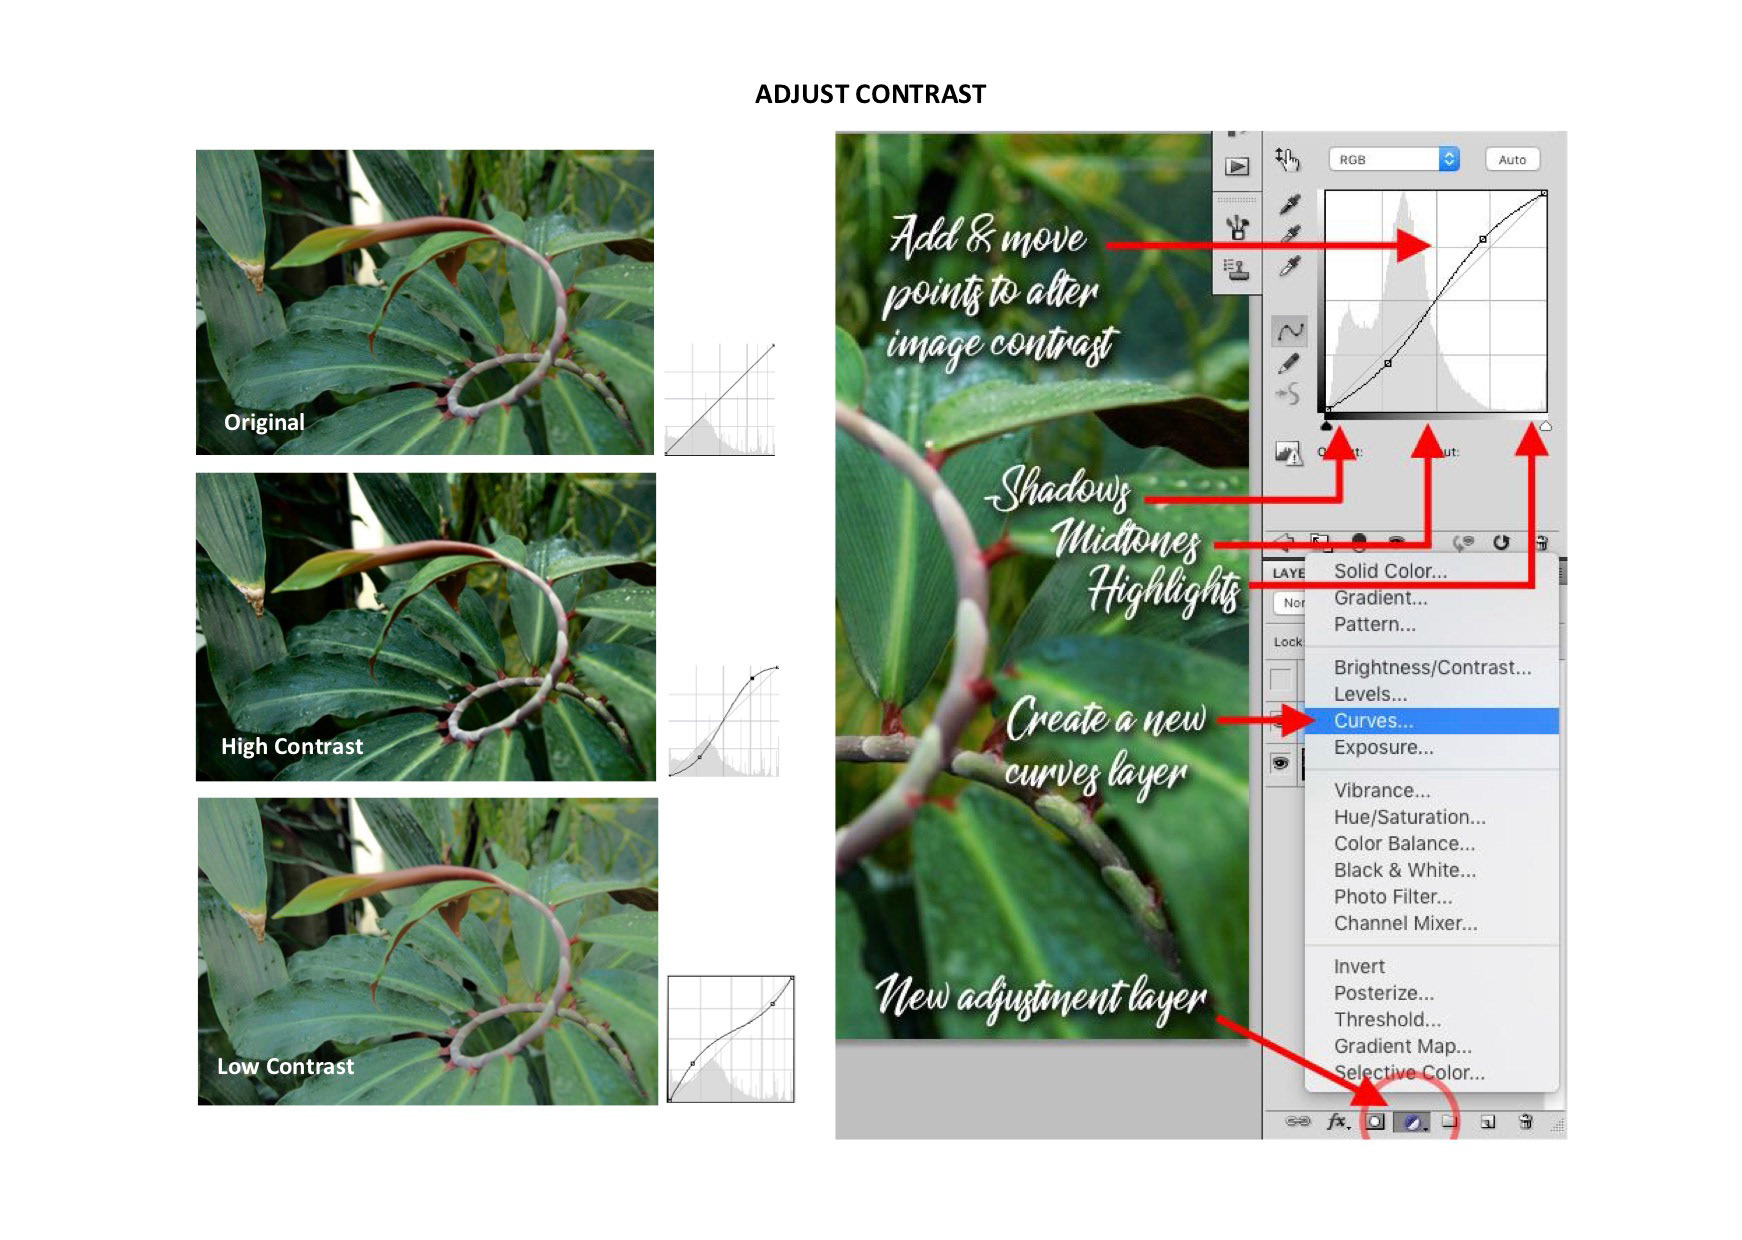
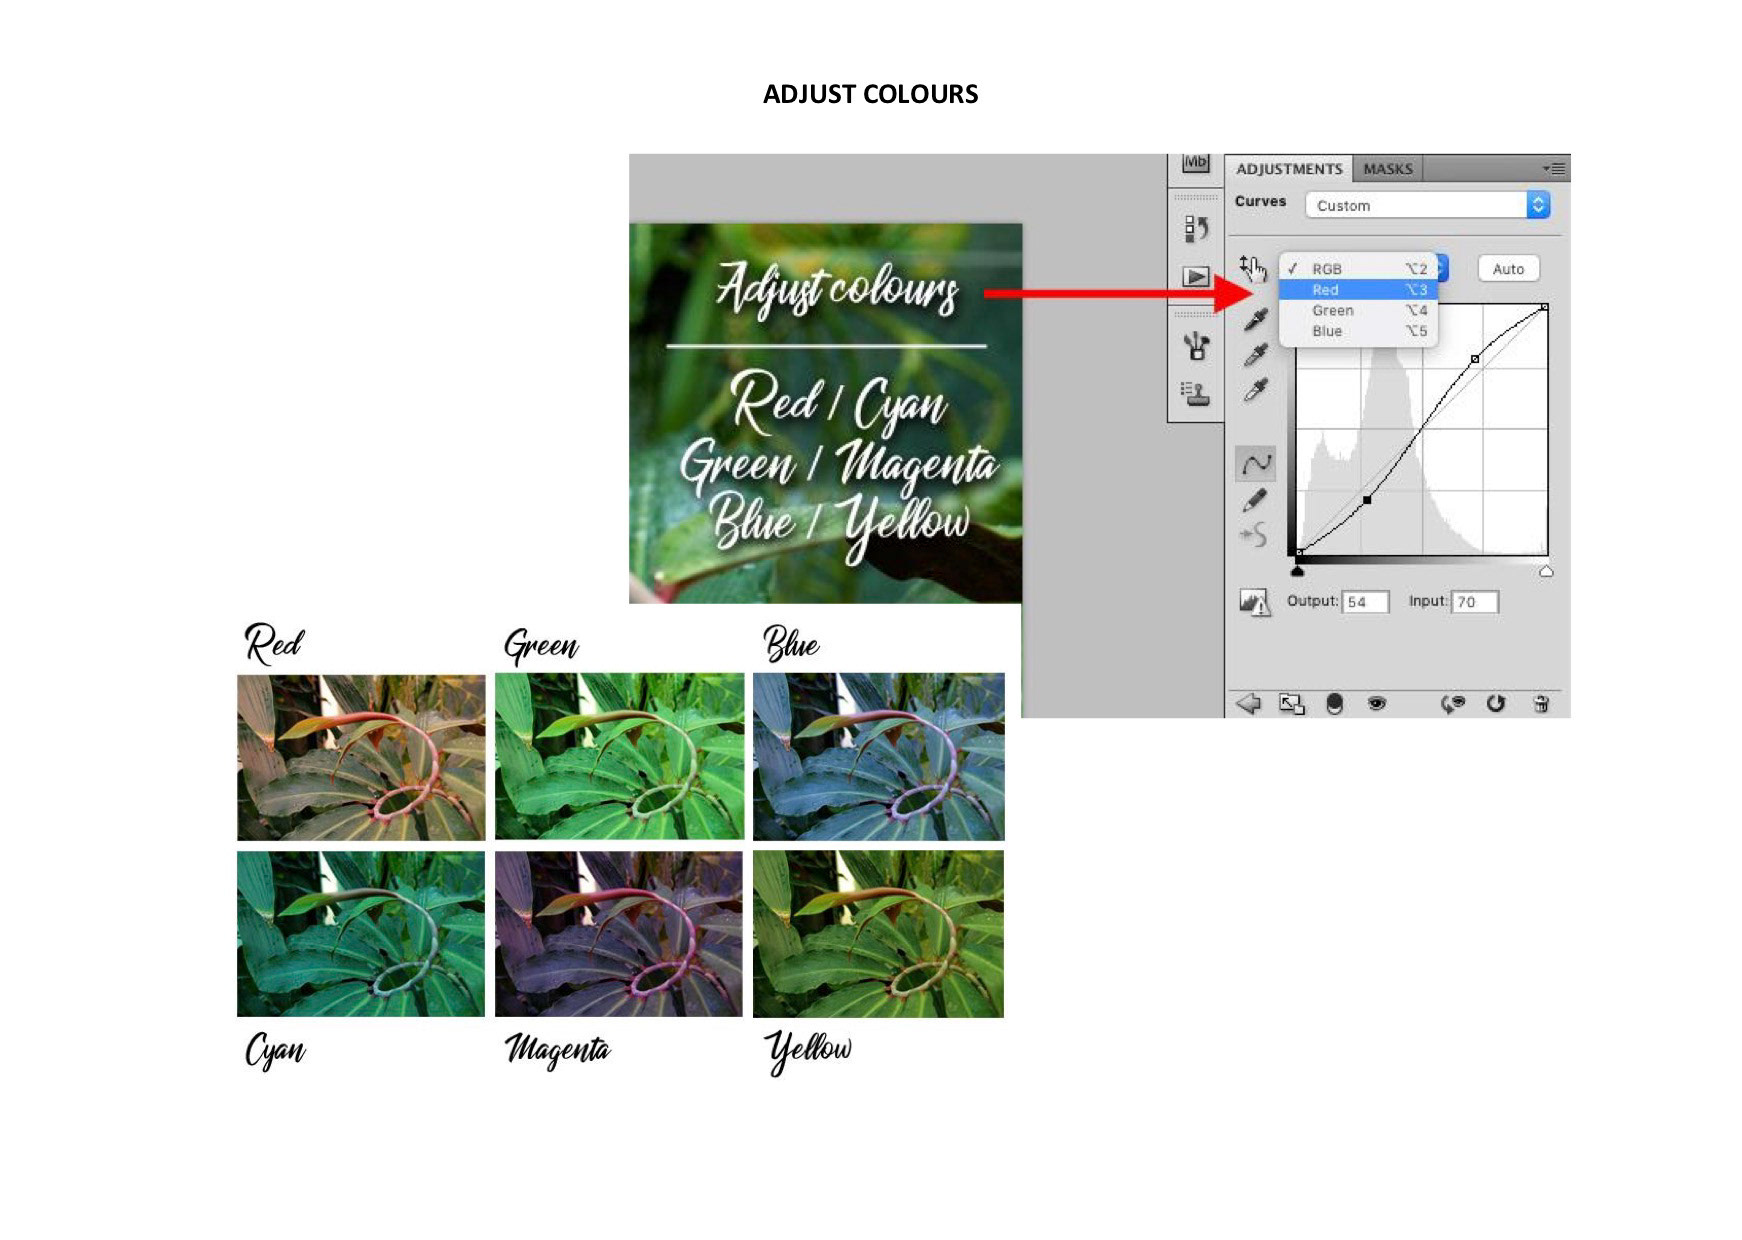
Using your favourite photos taken at Kew Gardens in Adobe Photoshop, get experimental with the enhancements and adjustments shown below. Any crops must be to the size of 305mm x 254mm so that your image is the right size for the canvasboard you will be using. You might also adjust the colours, contrast, or for more advanced changes you could try out using layer masks or blending modes to layer or composite multiple images together.
With every image you create in Photoshop, consider how well it will work as a painting.
Save your work in the Student Shared drive with your name in the title.
What you will need:
Photographs taken at Kew Gardens (in digital form, not printed) and a computer with Photoshop CS5 (or above) or Photopea.com.
Extension Task Option:
If you are already familiar with Photoshop and want to try out some more advanced features, try using layer masks to composite two or more images together, or layer multiple images and use different blending modes to create a double-exposure look.
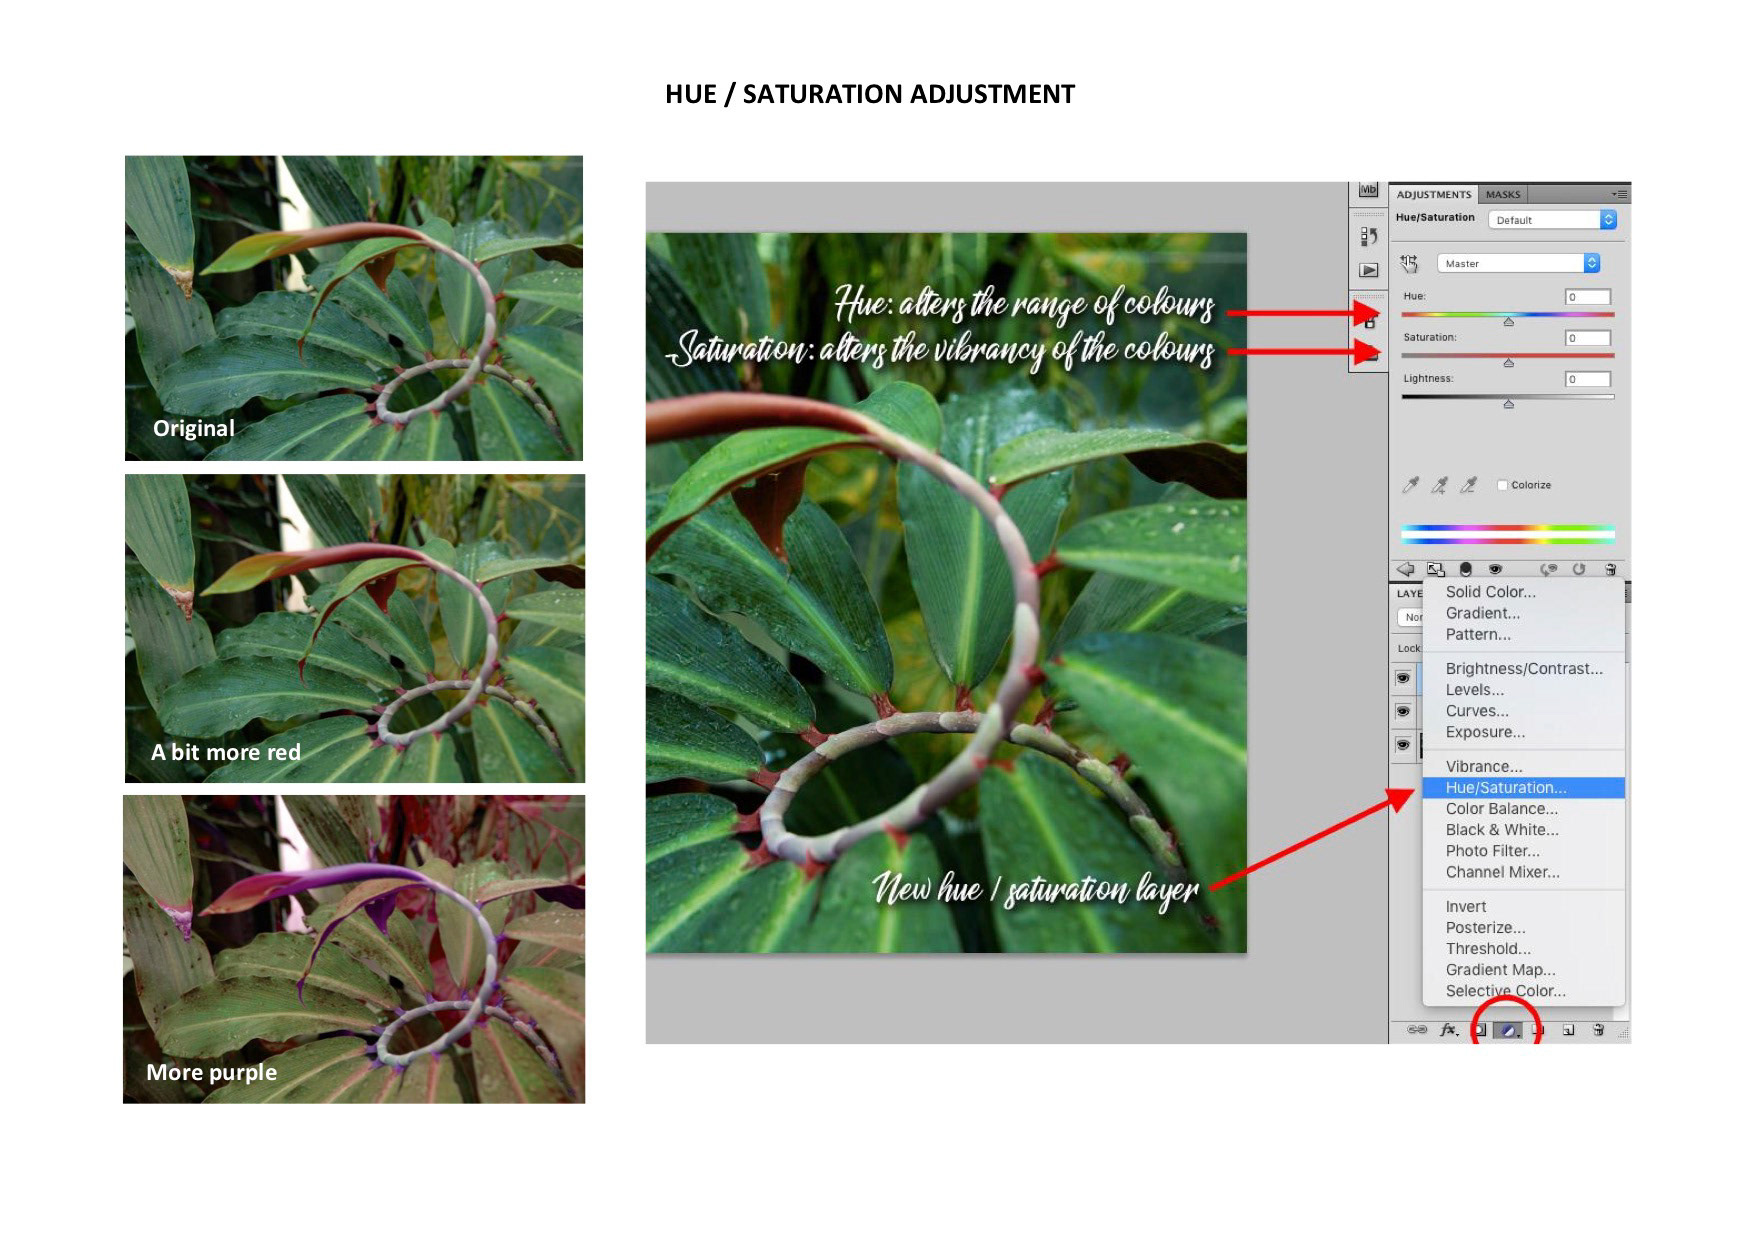
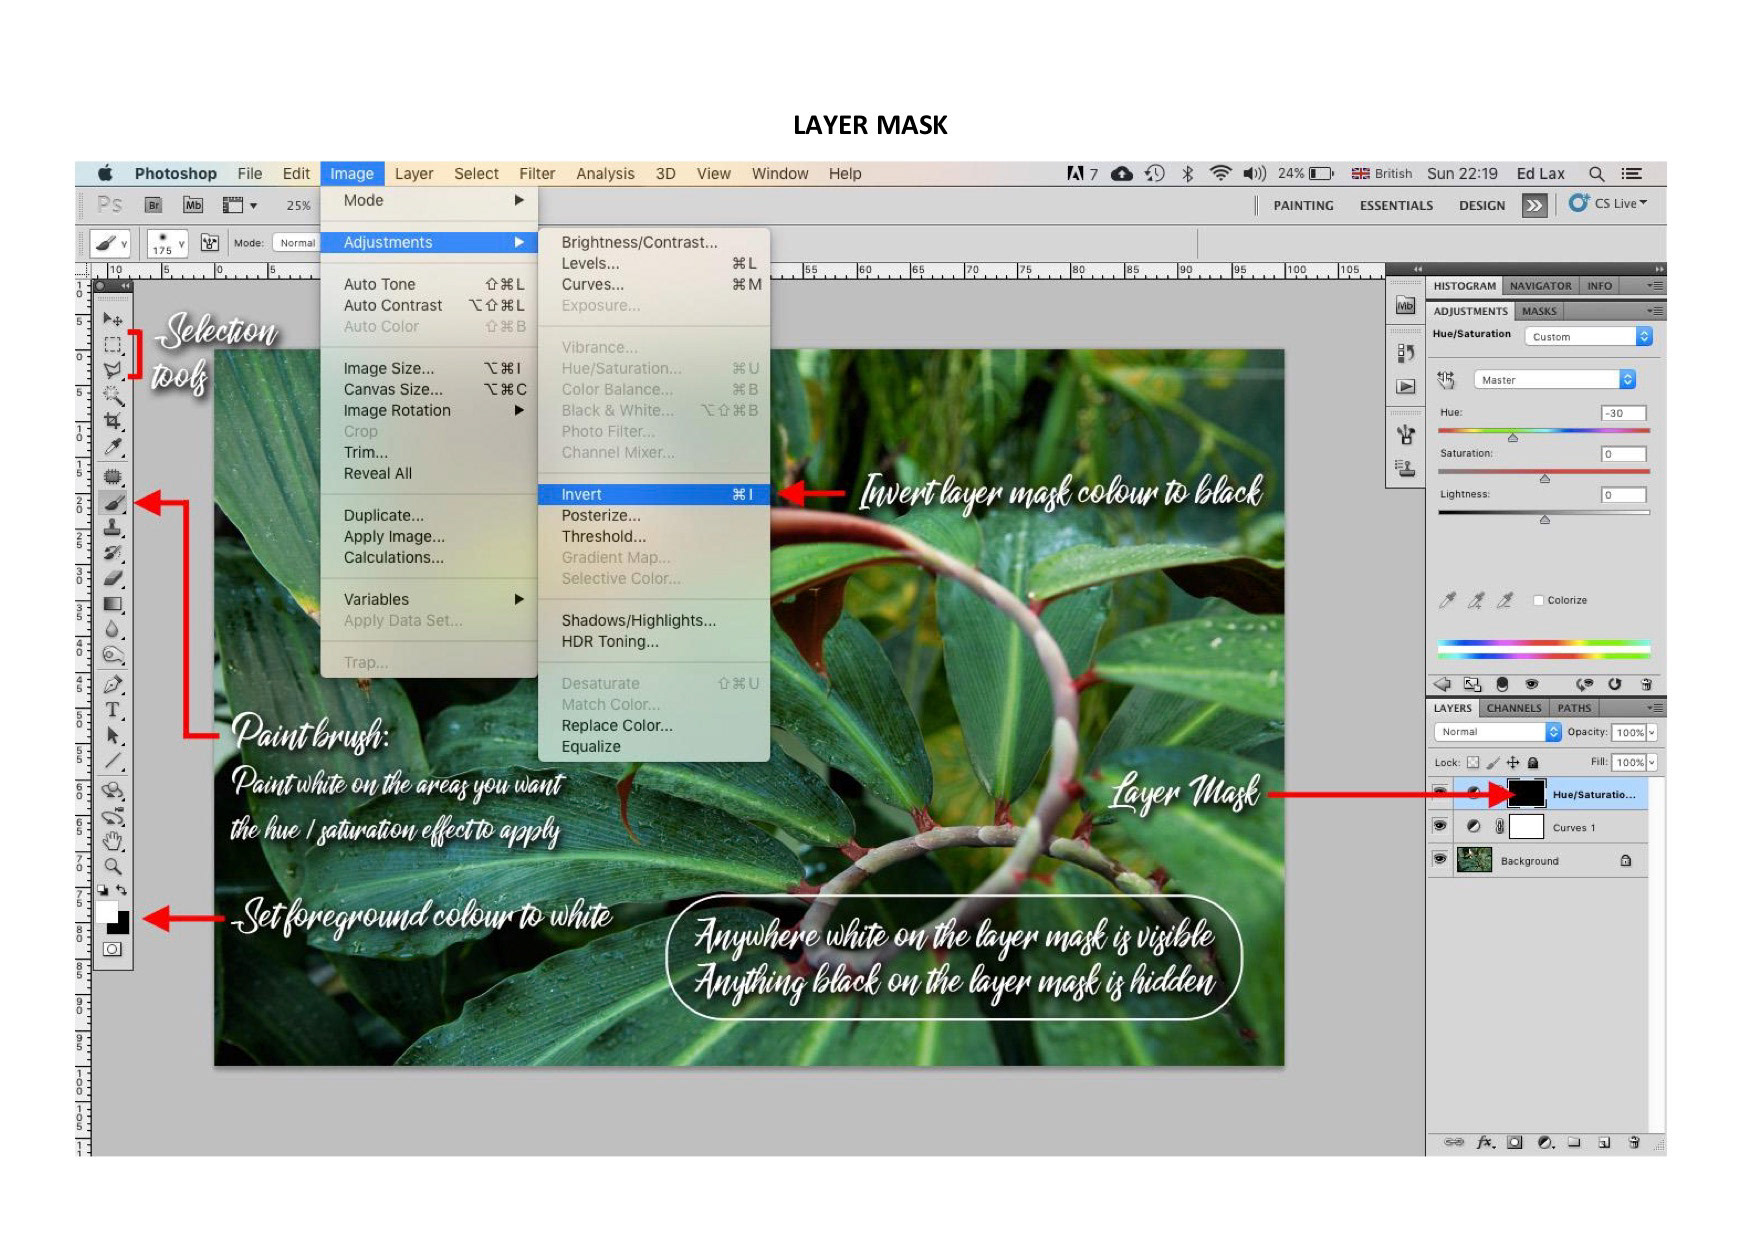
Common Adjustments:
The screenshots below direct you to the most common areas used in Photoshop. It includes cropping, layers, adjusting contrast, colours, hue/saturation and layer masks. They are designed as reminder notes once you have been shown how to do them by the teacher.
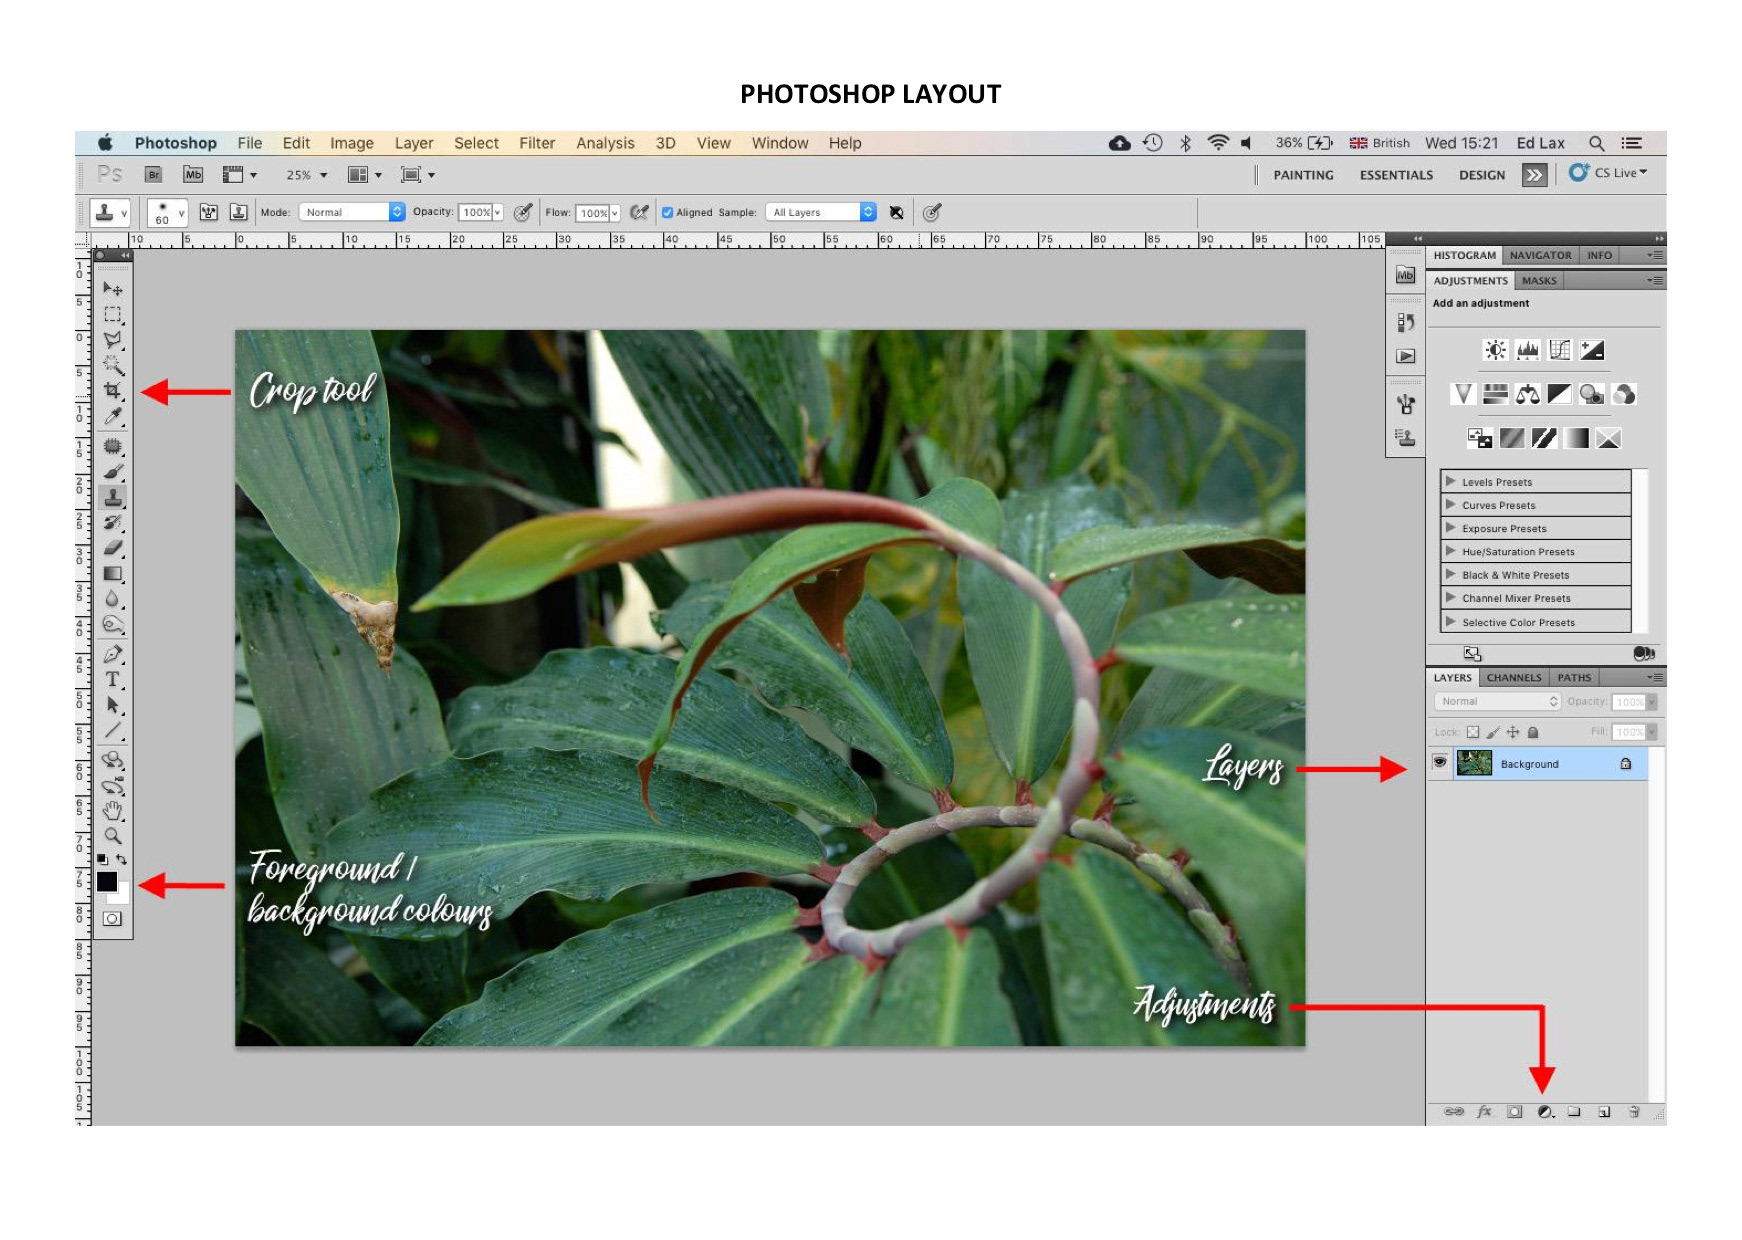
An overview of Photoshop (CS5):
Advanced Photoshop Techniques:
Top Tips:
• Be careful not to overdo it with Photoshop effects. Sometimes 'less is more', as overly edited images can become grainy or lose subtle details and variations in colour or tone.
• Save your work regularly so you are less likely to lose the changes you have made
• Be careful not to make your image too simple or too busy, as this can lead to an unsuitable image to paint later in class.