Learning Objectives:
• Understand how two-point perspective can improve the proportions of your drawings
• Learn the rules of two-point perspective
• Practise drawing using two-point perspective
• Learn the rules of two-point perspective
• Practise drawing using two-point perspective
What you will need:
Paper (or your sketchbook), a hard pencil (preferably HB, F or H), eraser, pencil sharpener and a ruler
Today's task:
1. Read through the PowerPoint below to learn about two-point perspective.
2. Watch the demo video below.
3. Have a go at producing your own drawing, following the guidance in the PowerPoint.
2. Watch the demo video below.
3. Have a go at producing your own drawing, following the guidance in the PowerPoint.
Introduction to two-point perspective:
Demo video:
Mr Lax's finished drawing:
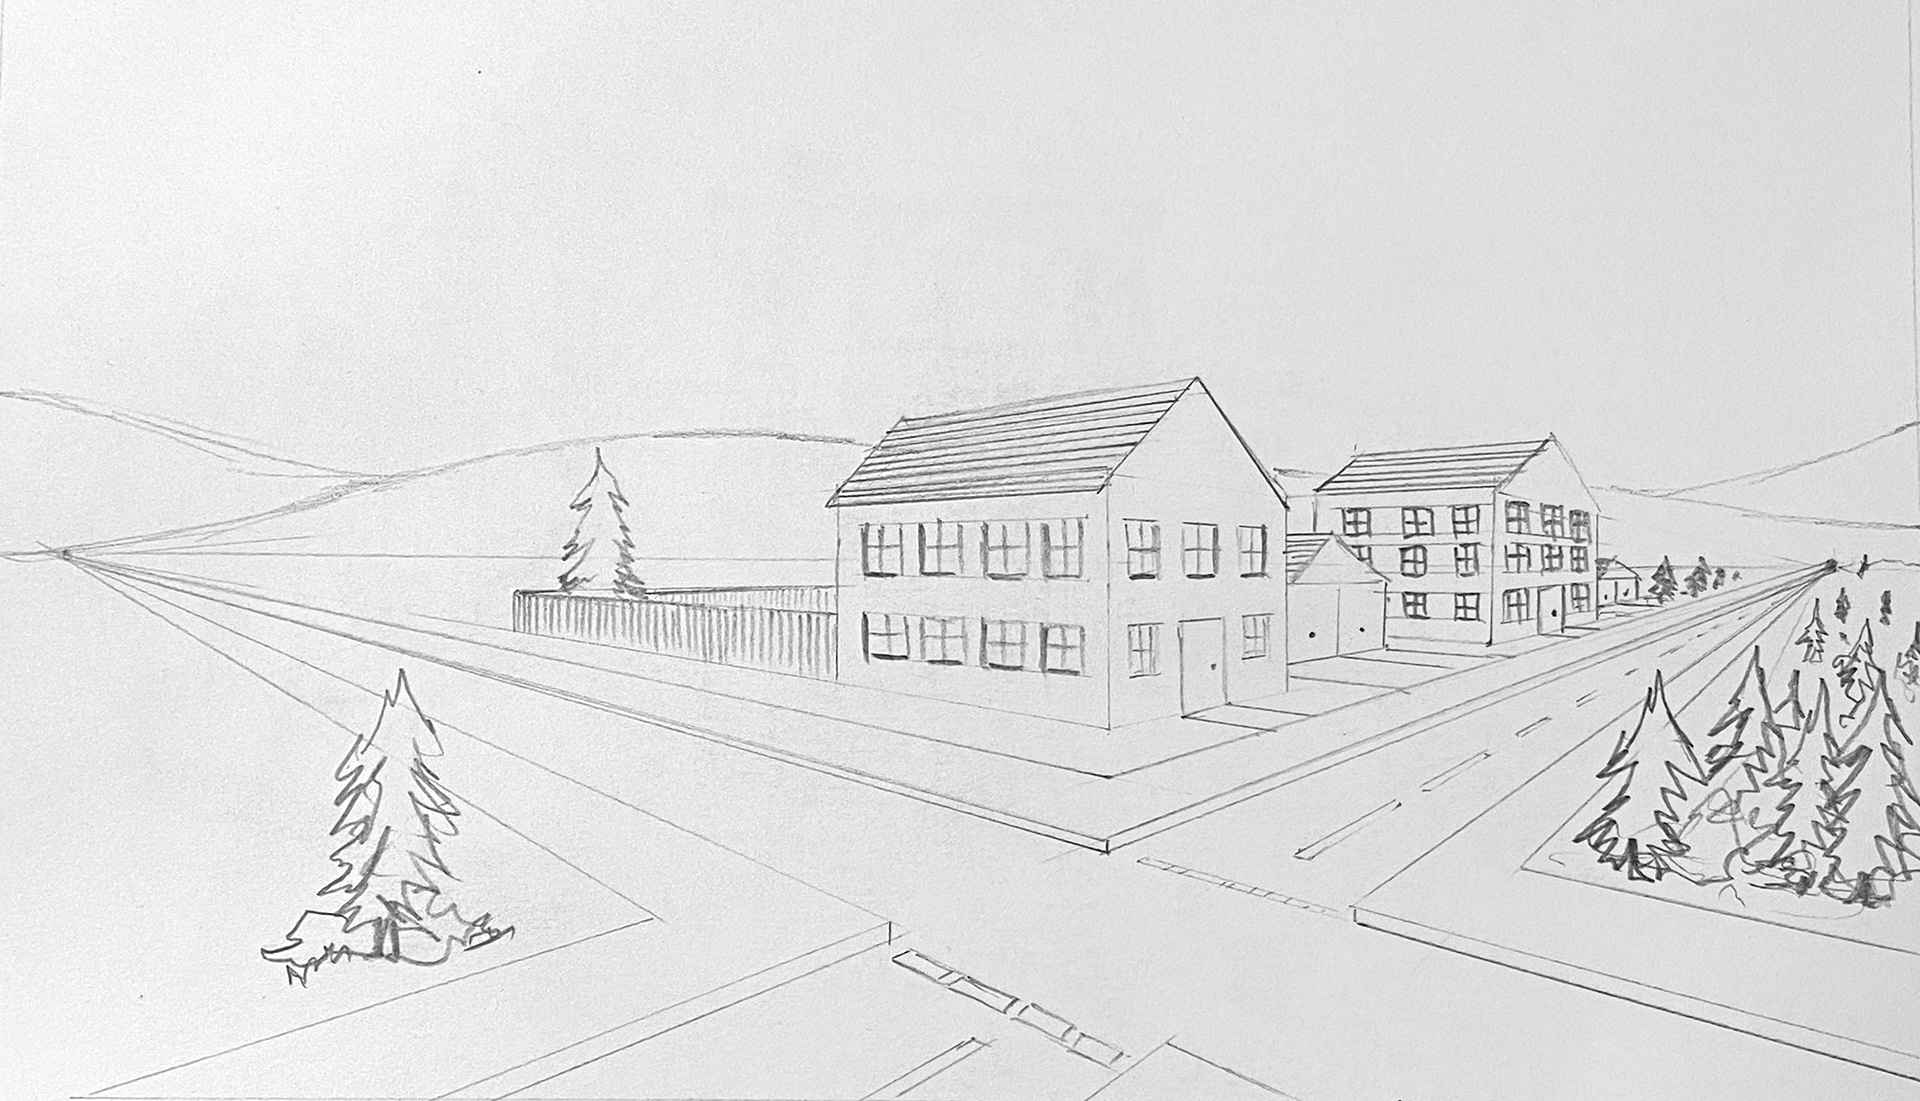
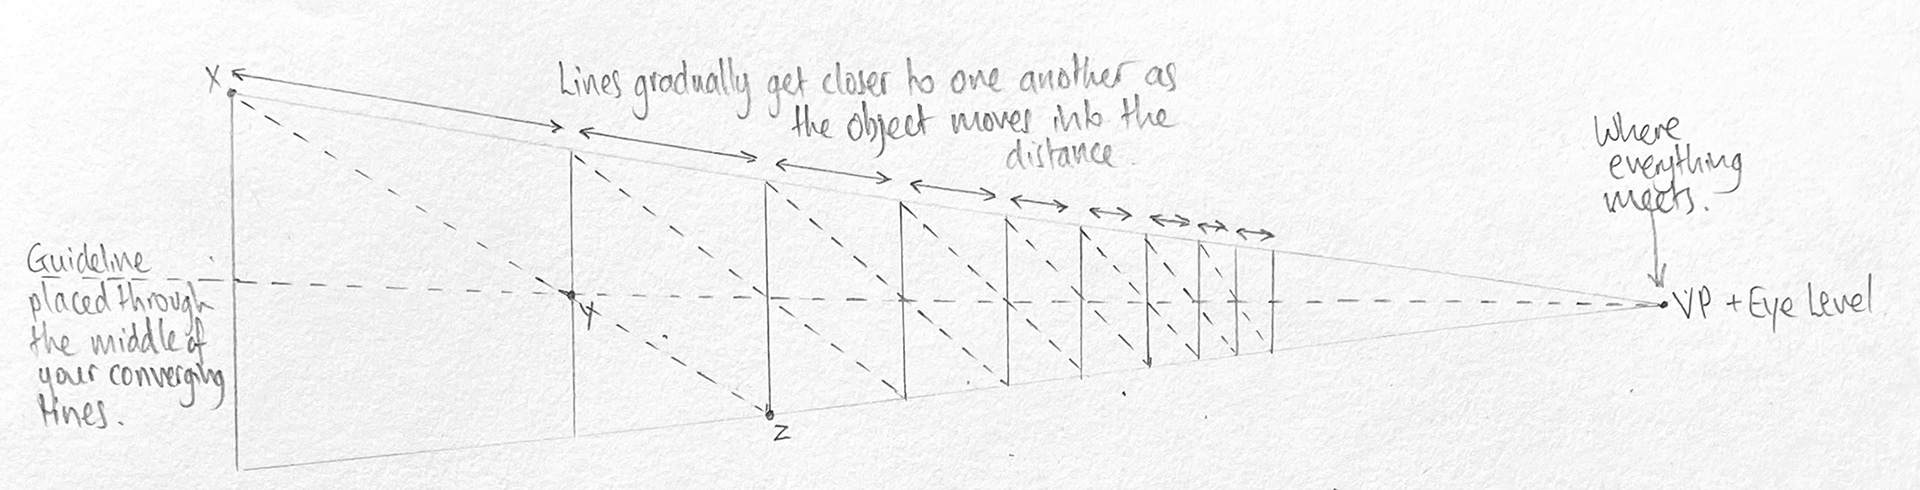
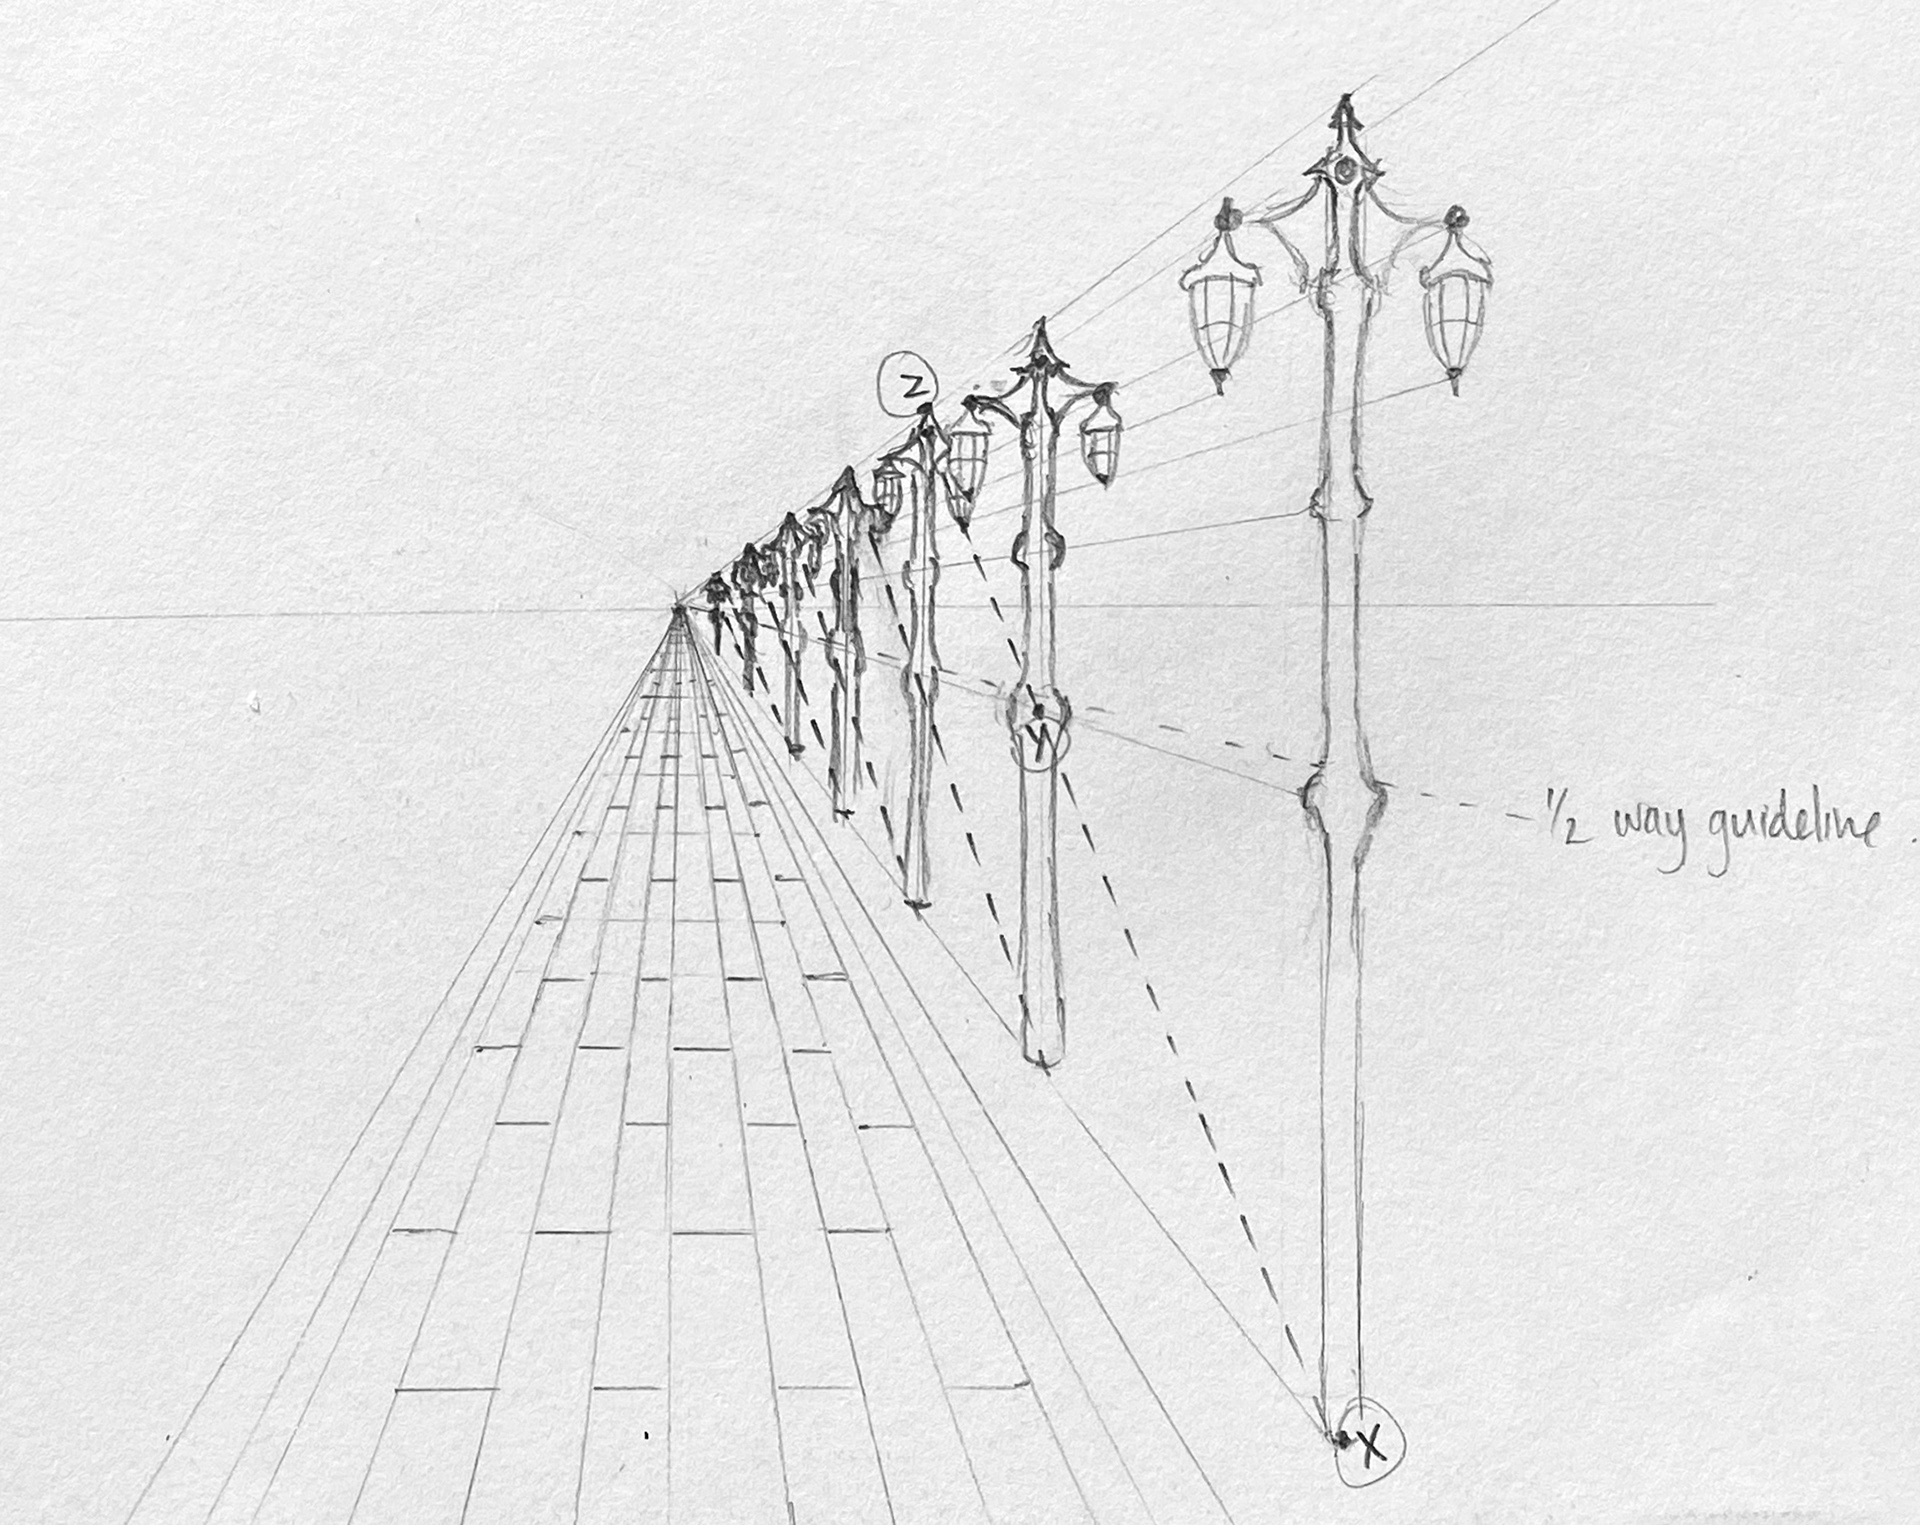
Using diagonal lines to work out spacing between shapes:
Top Tips:
• Always use a sharp pencil and a ruler
• Keep your vertical lines completely vertical
• If the side of a wall or object is pointing directly at you, you probably won't need to use any lines that are angled towards the vanishing point. But if the wall or object is angled, it is likely the horizontal lines will be angled towards the vanishing point (but not always!)
• The lines on the left side of each object/building tend to angle towards the left vanishing point, while the lines on the right side of each object/building tend to angle towards the right vanishing point.
• Remember to erase your guidelines once they are no longer needed
• Remember that even the details follow the rules of perspective
• If you choose to draw trees (or similar), use the vanishing points to work out how much smaller they get as they approach the vanishing point. This is just an average though, as all trees are different heights.