Learning Objectives:
• Understand how three-point perspective can improve the proportions of your drawings
• Learn the rules of three-point perspective
• Practise drawing using three-point perspective
• Learn the rules of three-point perspective
• Practise drawing using three-point perspective
What you will need:
Paper (or your sketchbook), a hard pencil (preferably HB, F or H), eraser, pencil sharpener and a ruler
Today's task:
1. Read through the PowerPoint below to learn about three-point perspective.
2. Watch the demo video below.
3. Have a go at producing your own drawing, following the guidance in the PowerPoint.
2. Watch the demo video below.
3. Have a go at producing your own drawing, following the guidance in the PowerPoint.
Recap of two-point perspective and introduction to three-point perspective:
Demo video:
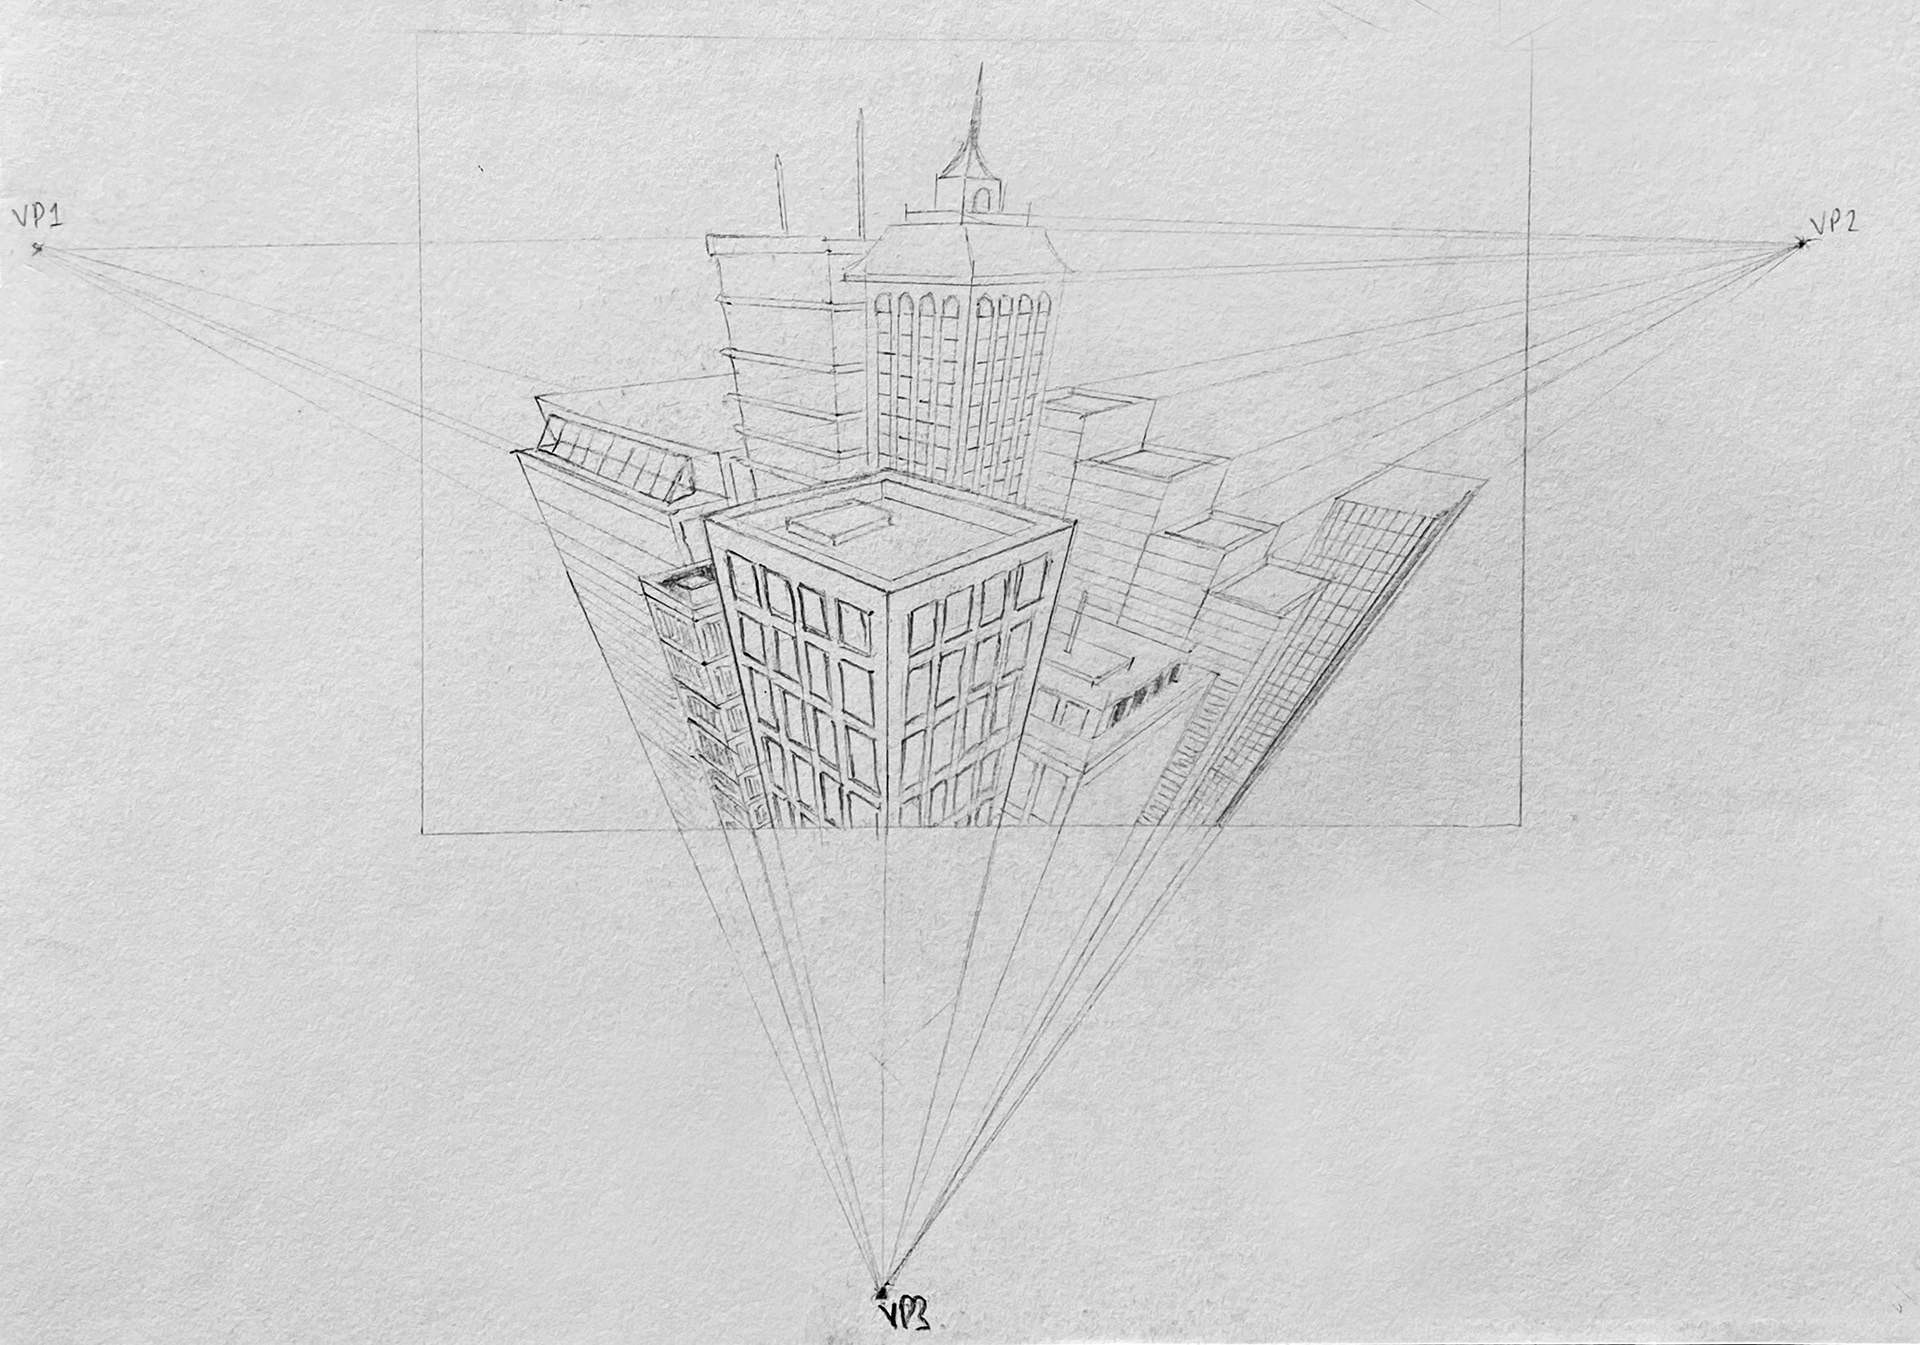
Mr Lax's finished drawing:
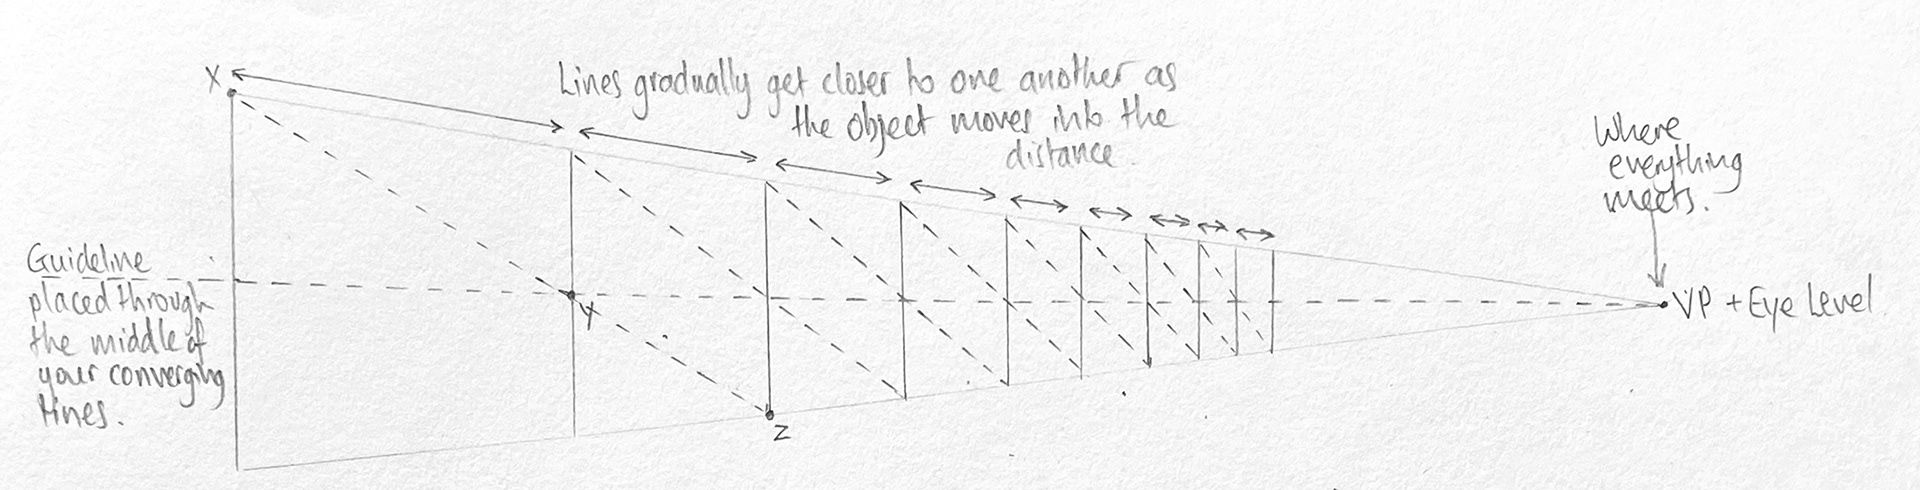
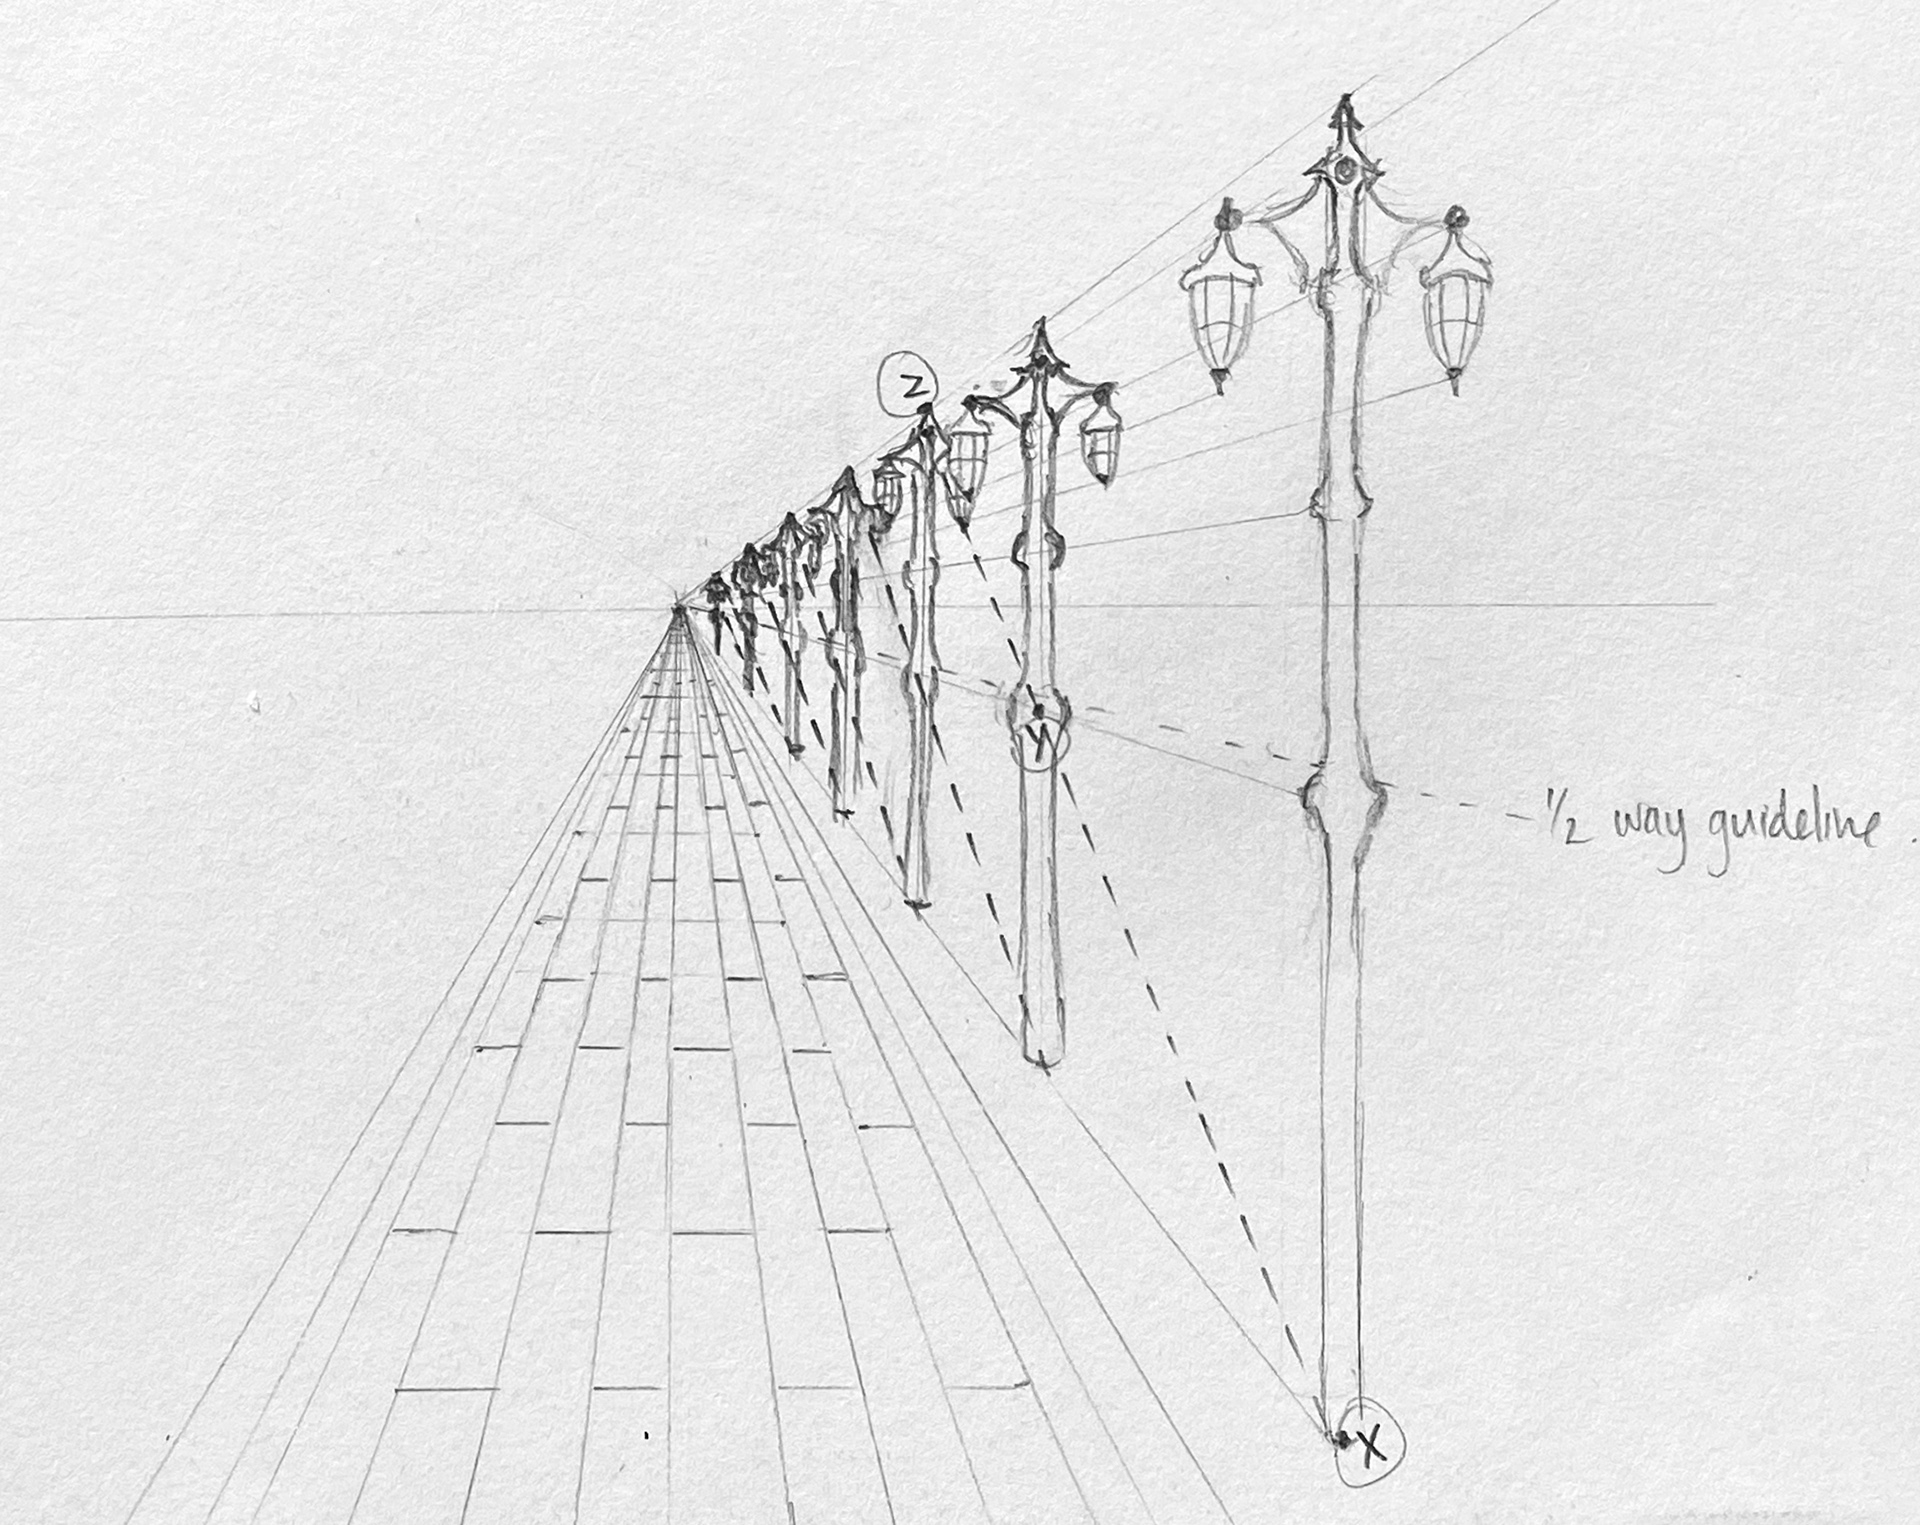
Using diagonal lines to work out spacing between shapes:
Top Tips:
• Always use a sharp pencil and a ruler
• Nearly ALL lines head to at least one of the vanishing points when using three-point perspective, but there are exceptions, such as sloped roofs
• If you are looking at the left hand side of a shape, the lines probably head towards the left vanishing point, while the lines on the right hand side probably head towards the right vanishing point. However, if you are drawing the inside of a cuboid, it can get confusing as it might appear to be the other way round.
• Remember to erase your guidelines once they are no longer needed
• Remember that even the details follow the rules of perspective
• Consider how high/low you place the horizon line, as this will determine the eye level of the viewer