Learning Objectives:
• Understand how cross-hatching can be used to create tone
• Explore how cross-hatching can be used to add texture to a drawing
• Practise using a line of symmetry to improve measuring skills and accuracy of proportions
• Understand what makes successful cross-hatching.
• Explore how cross-hatching can be used to add texture to a drawing
• Practise using a line of symmetry to improve measuring skills and accuracy of proportions
• Understand what makes successful cross-hatching.
What you will need:
• Drawing pencils
• Cartridge paper (or your sketchbook)
• Ruler
• Eraser
• Pencil sharpener
• Black fine liner pen
• Cartridge paper (or your sketchbook)
• Ruler
• Eraser
• Pencil sharpener
• Black fine liner pen
Introduction:
Let’s talk about cross-hatching – it’s like the secret sauce for artists! They use it to make their drawings come alive with shadows, textures, and cool effects.
Picture this: they draw lots of lines that crisscross each other. If they’re really close together, it makes the drawing look dark and mysterious. But if they spread them out, it’s like turning on a light – everything gets brighter! And by changing how thick or thin the lines are, you can make your drawings look 3D on a flat piece of paper.
So try adding some cross-hatching magic to your drawings – you’ll be amazed how much depth, volume and texture they can create.

Your Task:
1. Read the PowerPoint and information below, titled 'What is cross-hatching?'
2. Watch the demo video below the PowerPoint.
3. Have a go at copying the same exercise as the work in the video, following the advice in the video and the tips at the bottom of this page.
2. Watch the demo video below the PowerPoint.
3. Have a go at copying the same exercise as the work in the video, following the advice in the video and the tips at the bottom of this page.
What is cross-hatching?
Before you start to draw an object, look at it really closely and try to work out which areas are the lightest (the highlights), the darkest (the shadows) and all the different shades in between (the midtones).

Once you understand the role of light in your drawings, you can use cross-hatching to add tone, which will make it look more 3D.
You can do this with smooth shading, too, but cross-hatching is often quicker, and it can be used to add texture to a surface. Sometimes the lines are really clear, while other times you can only tell it is cross-hatching when you look up close.
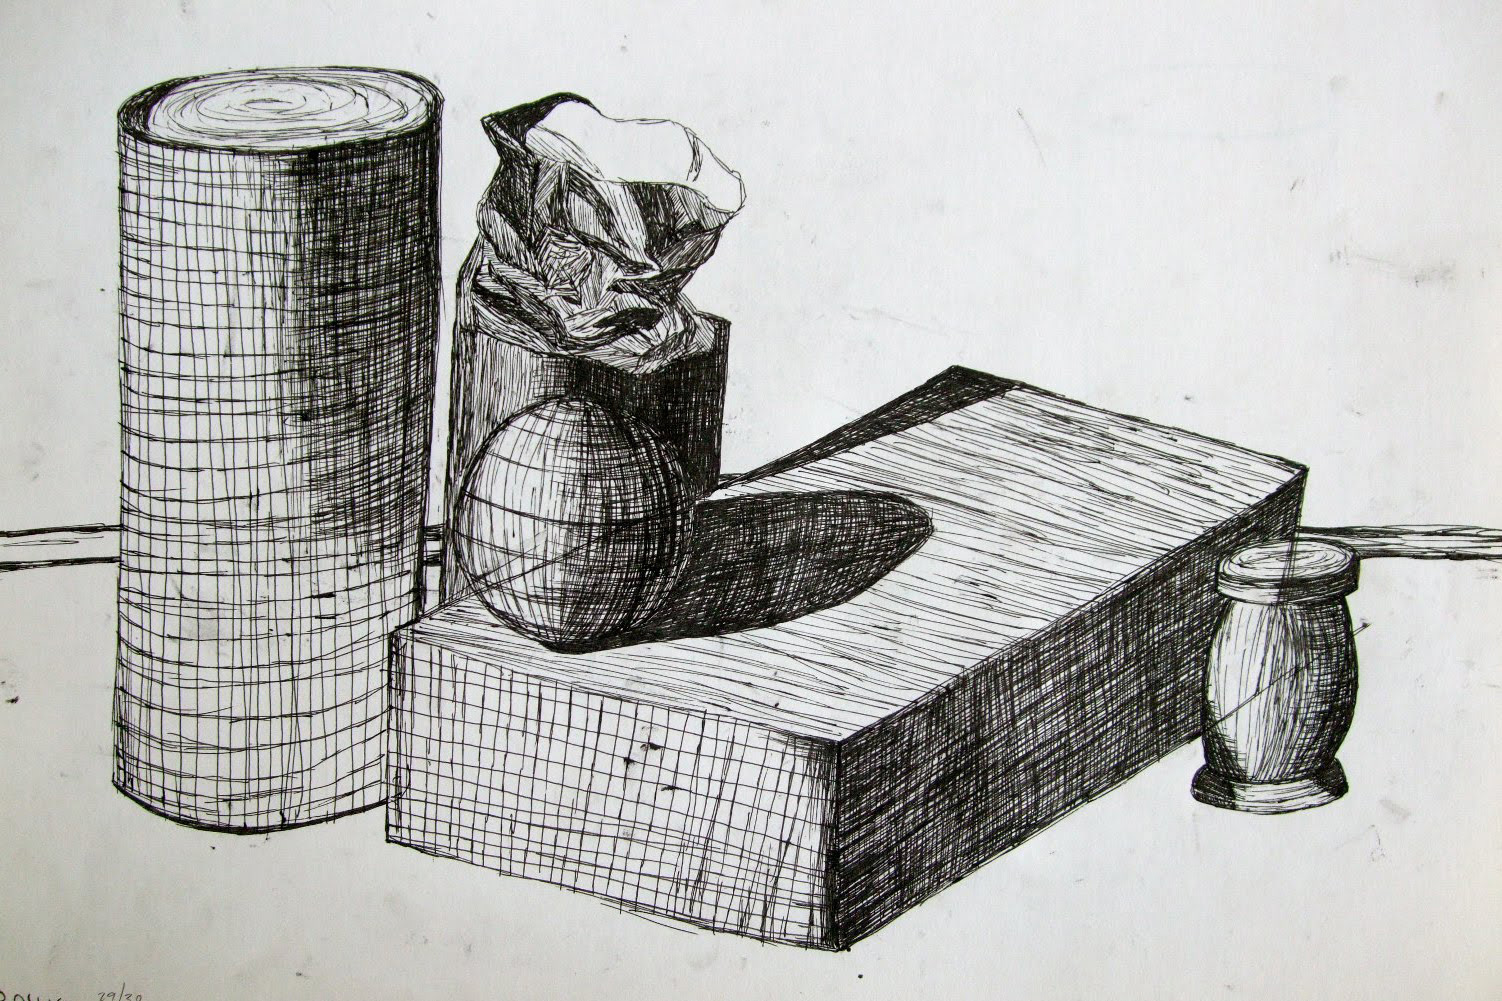
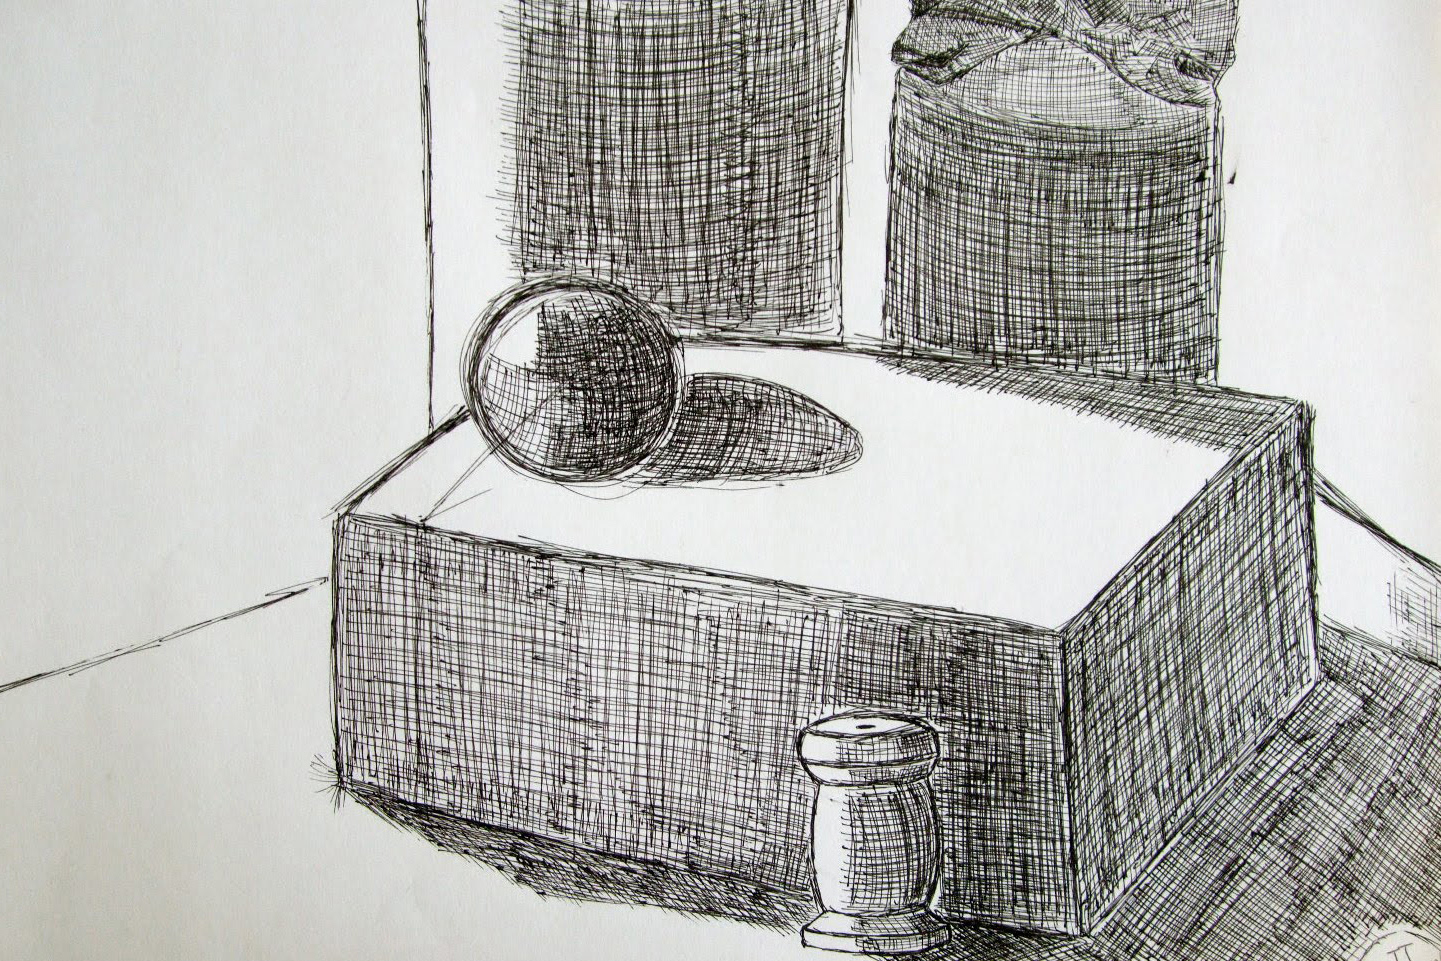
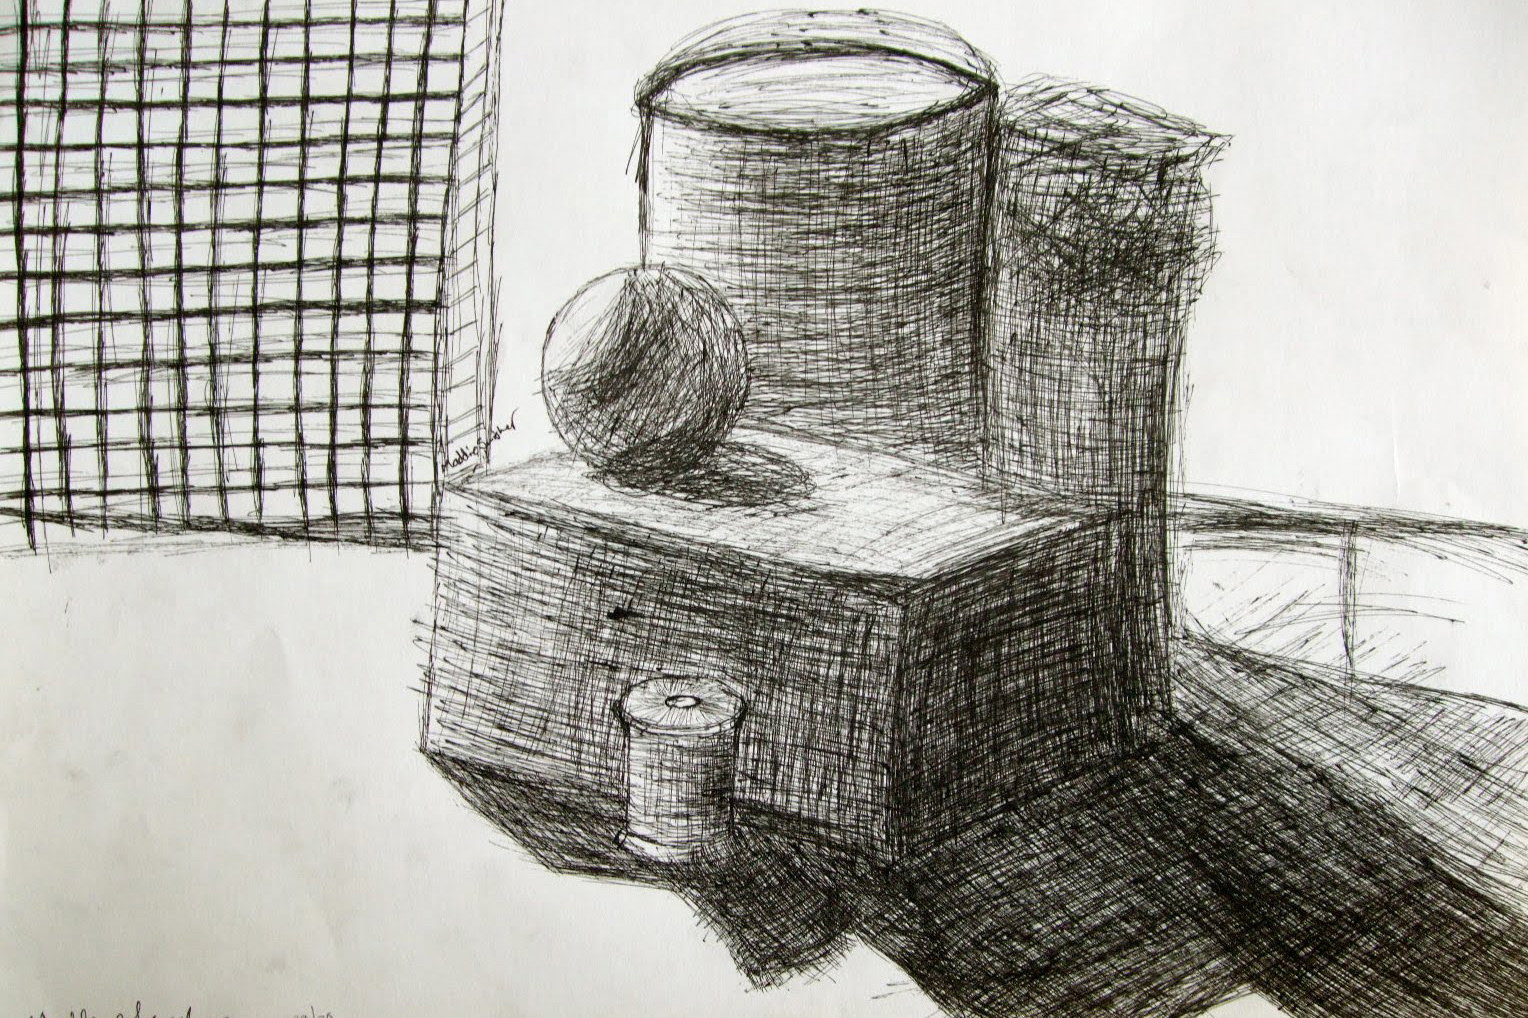
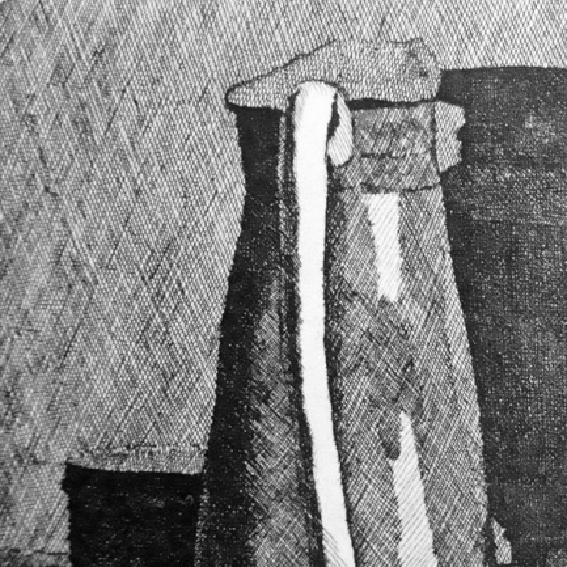
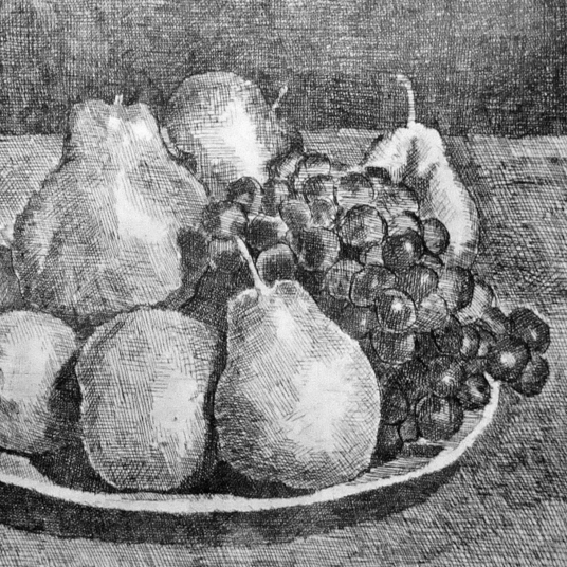
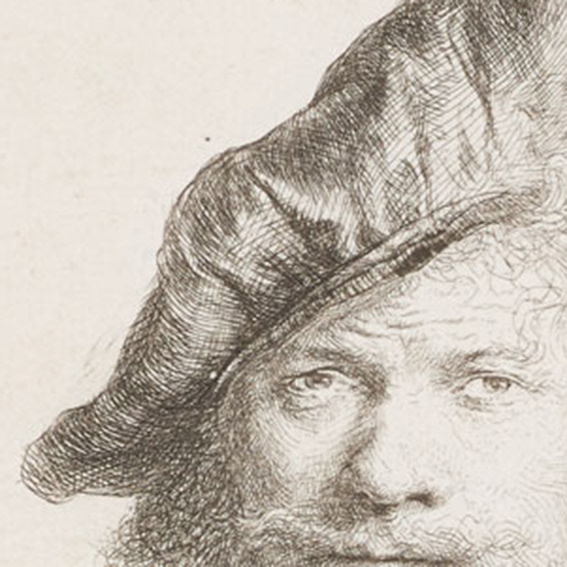
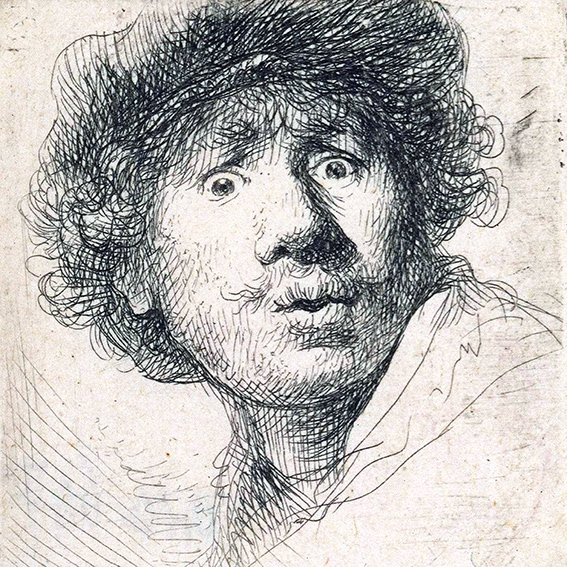
Examples of cross-hatching:
Famous artists who have used cross-hatching:
Now it's your turn!
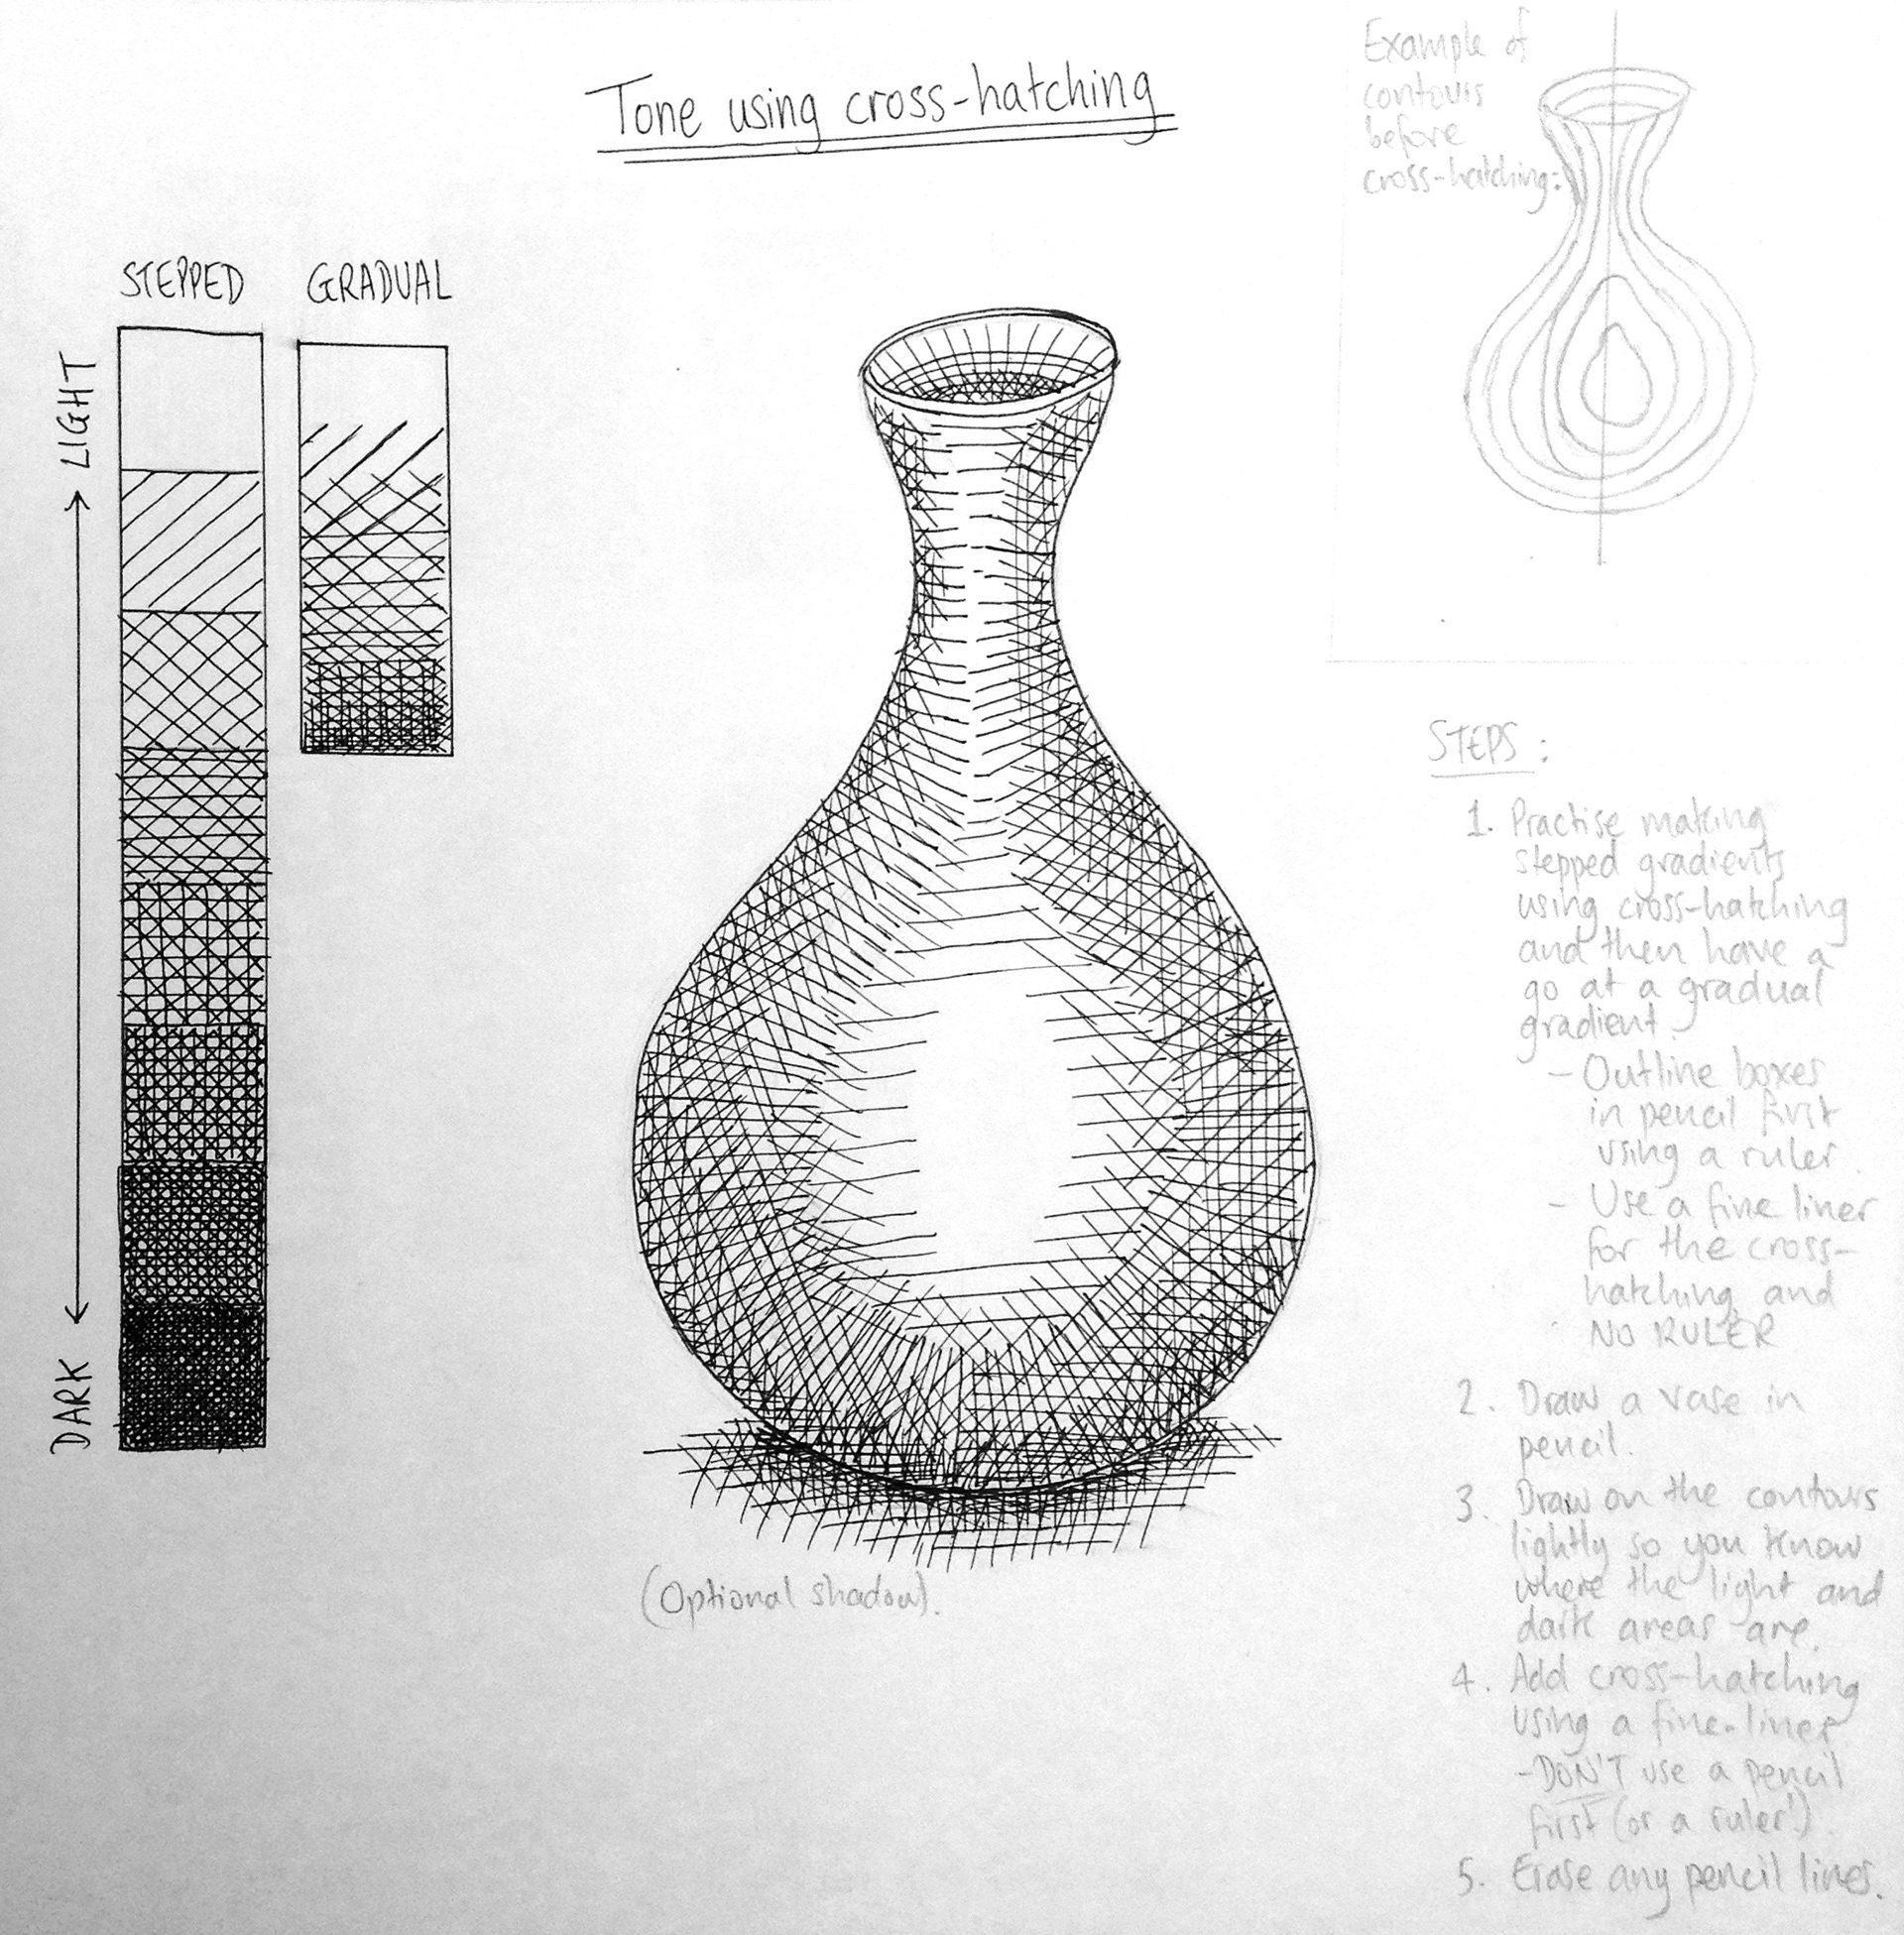
1. Start by drawing parallel lines close together to create a dark area. The closer the lines, the darker the tone.
2. To make a mid-tone, space the lines a bit further apart so more white paper shows through.
3. For lighter tones, draw the lines even more spaced out.
4. For the lightest highlights, leave the paper mostly blank with few or no lines.
5. To create deeper shadows, add a second set of lines crossing over the first set (hence “cross-hatching”) at an angle. The more layers of crossing lines, the darker the tone.
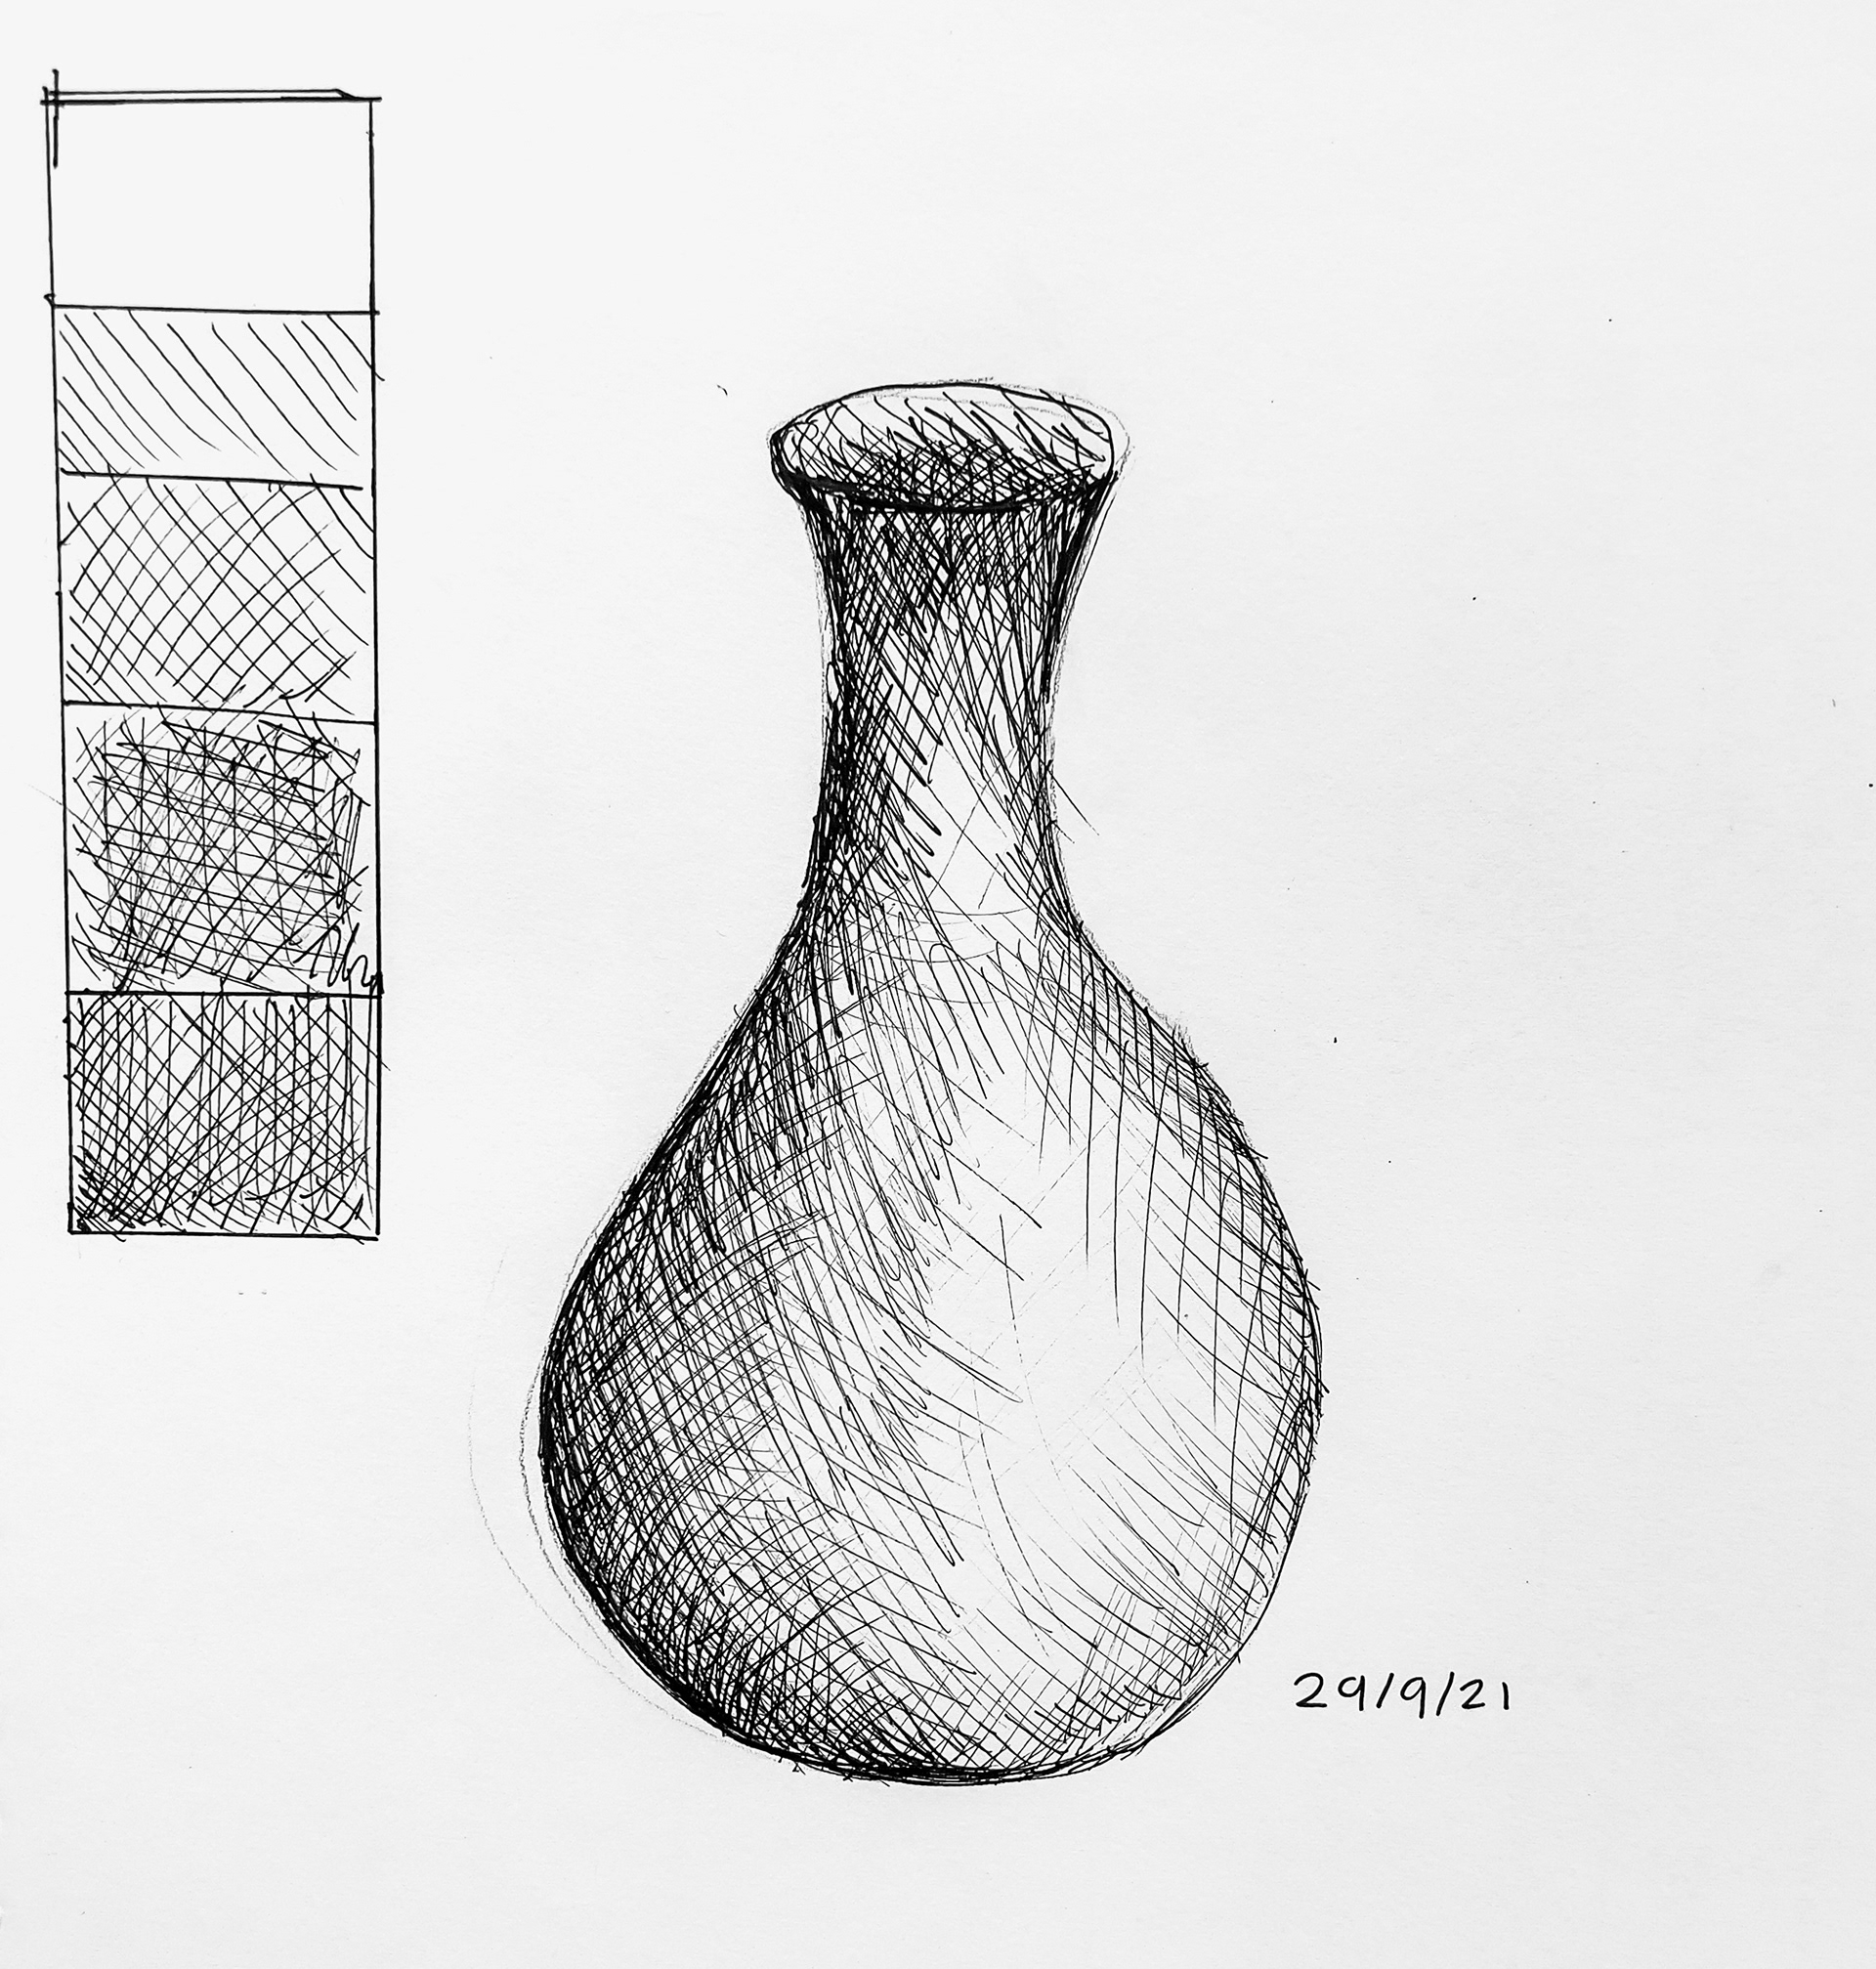
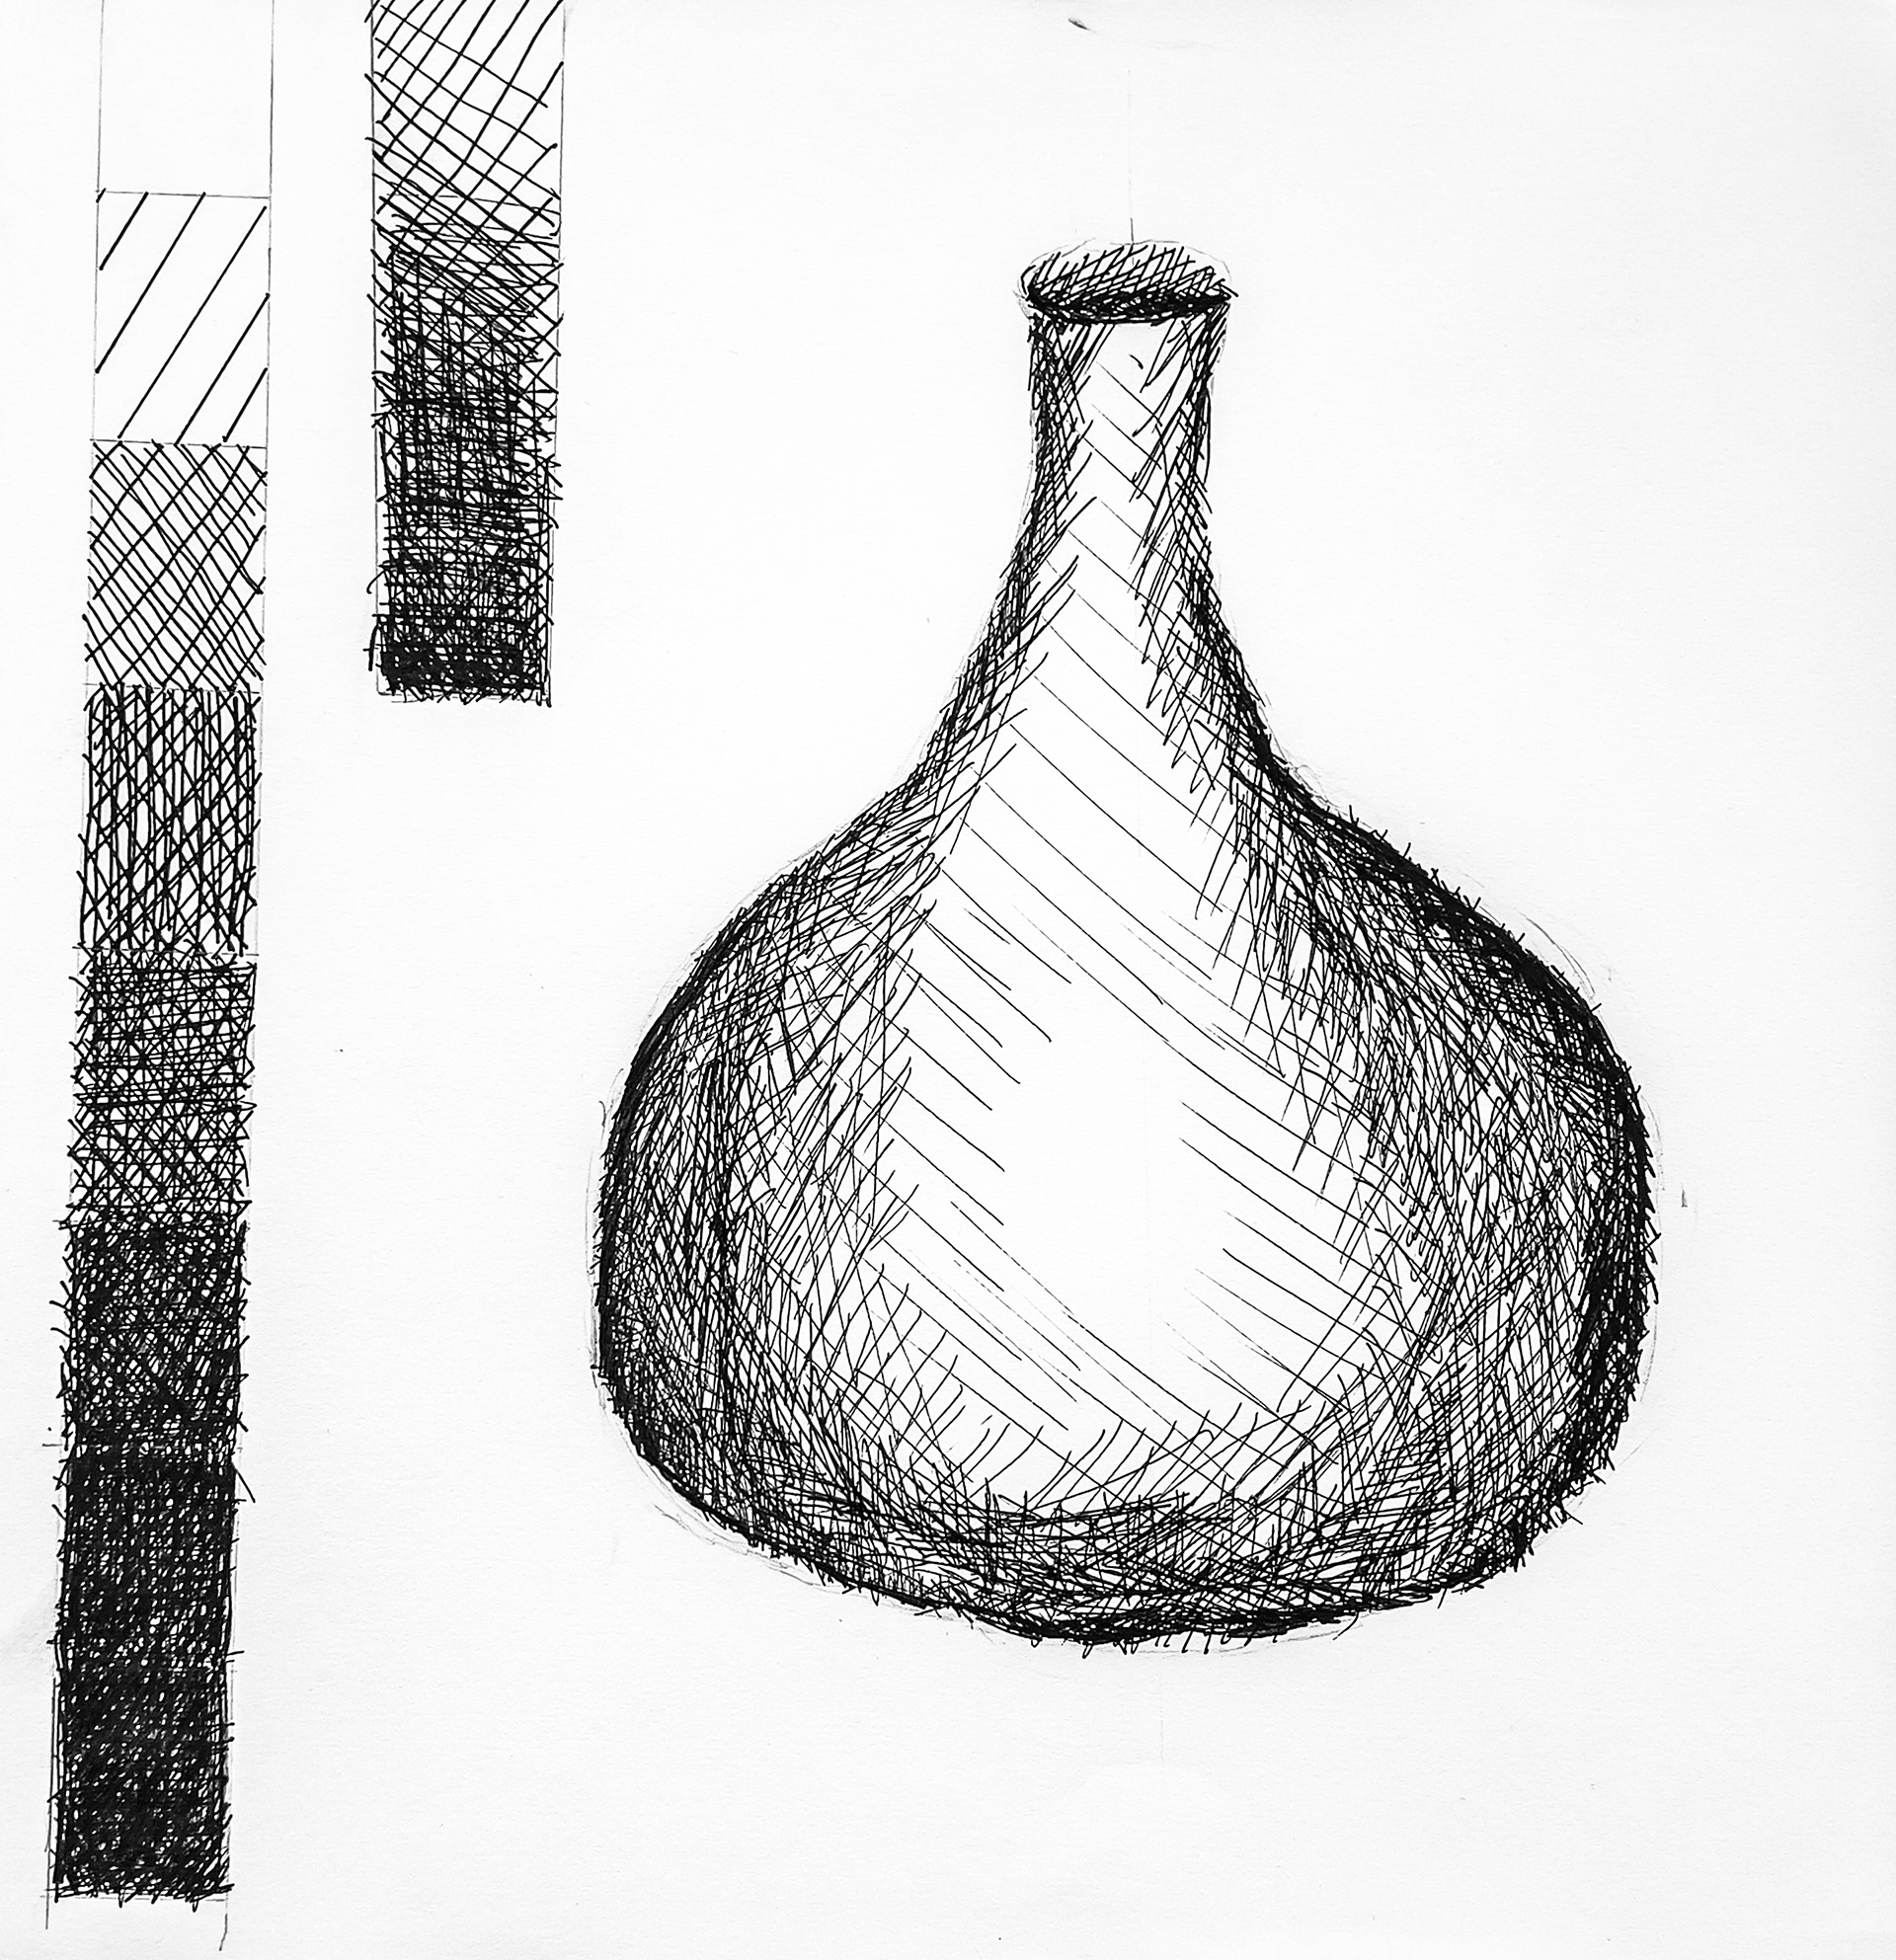
Have a go at the exercise below, using cross-hatching to make a drawing of a vase look 3D.
Mr Lax's example:
Extension Activity
If you are confident at drawing you might choose to draw a more challenging vase. Pick one with a more unusual shape and/or with more variations of tone (lights and darks).
Top Tips
• Try to press as lightly as you can with your pencil when drawing your initial outlines
• Plan your initial outlines carefully, making sure the vase is symmetrical (the left side should mirror the right side)
• Don't use a ruler when drawing cross-hatching
• Vary the tone by placing your cross-hatching lines closer together in the shadows and further apart in the highlights
• Consider what direction the light is shining
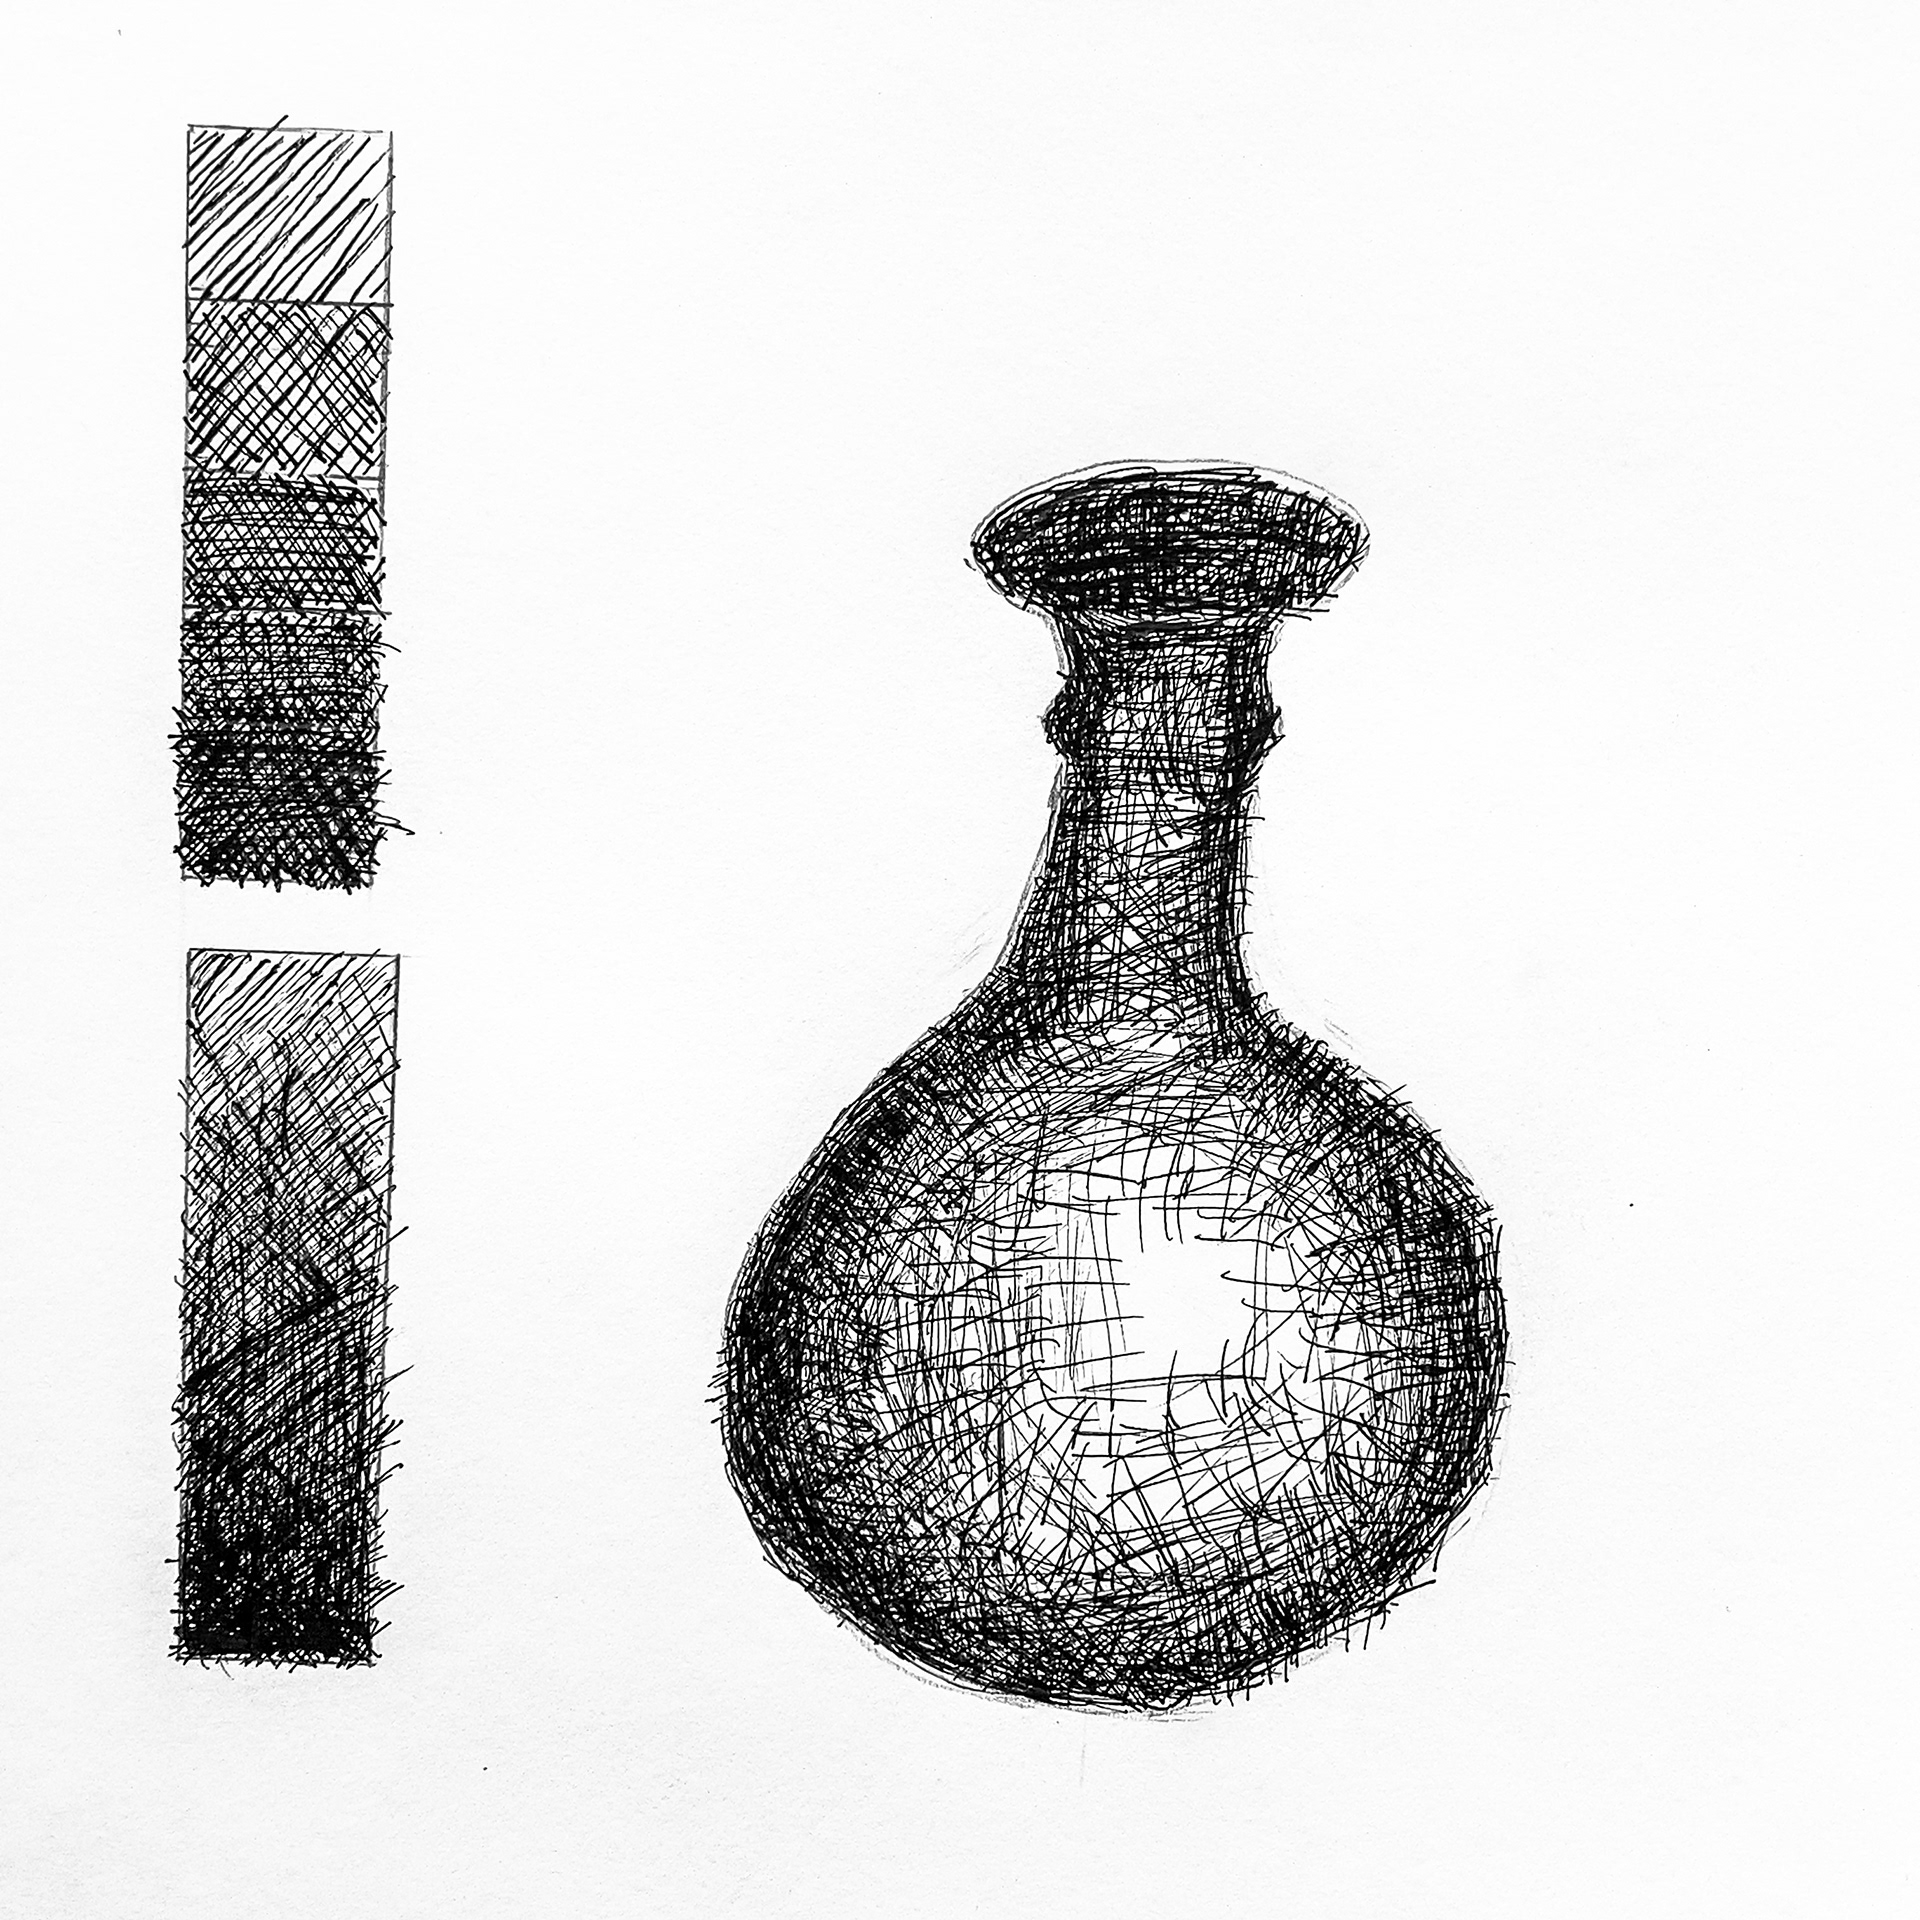
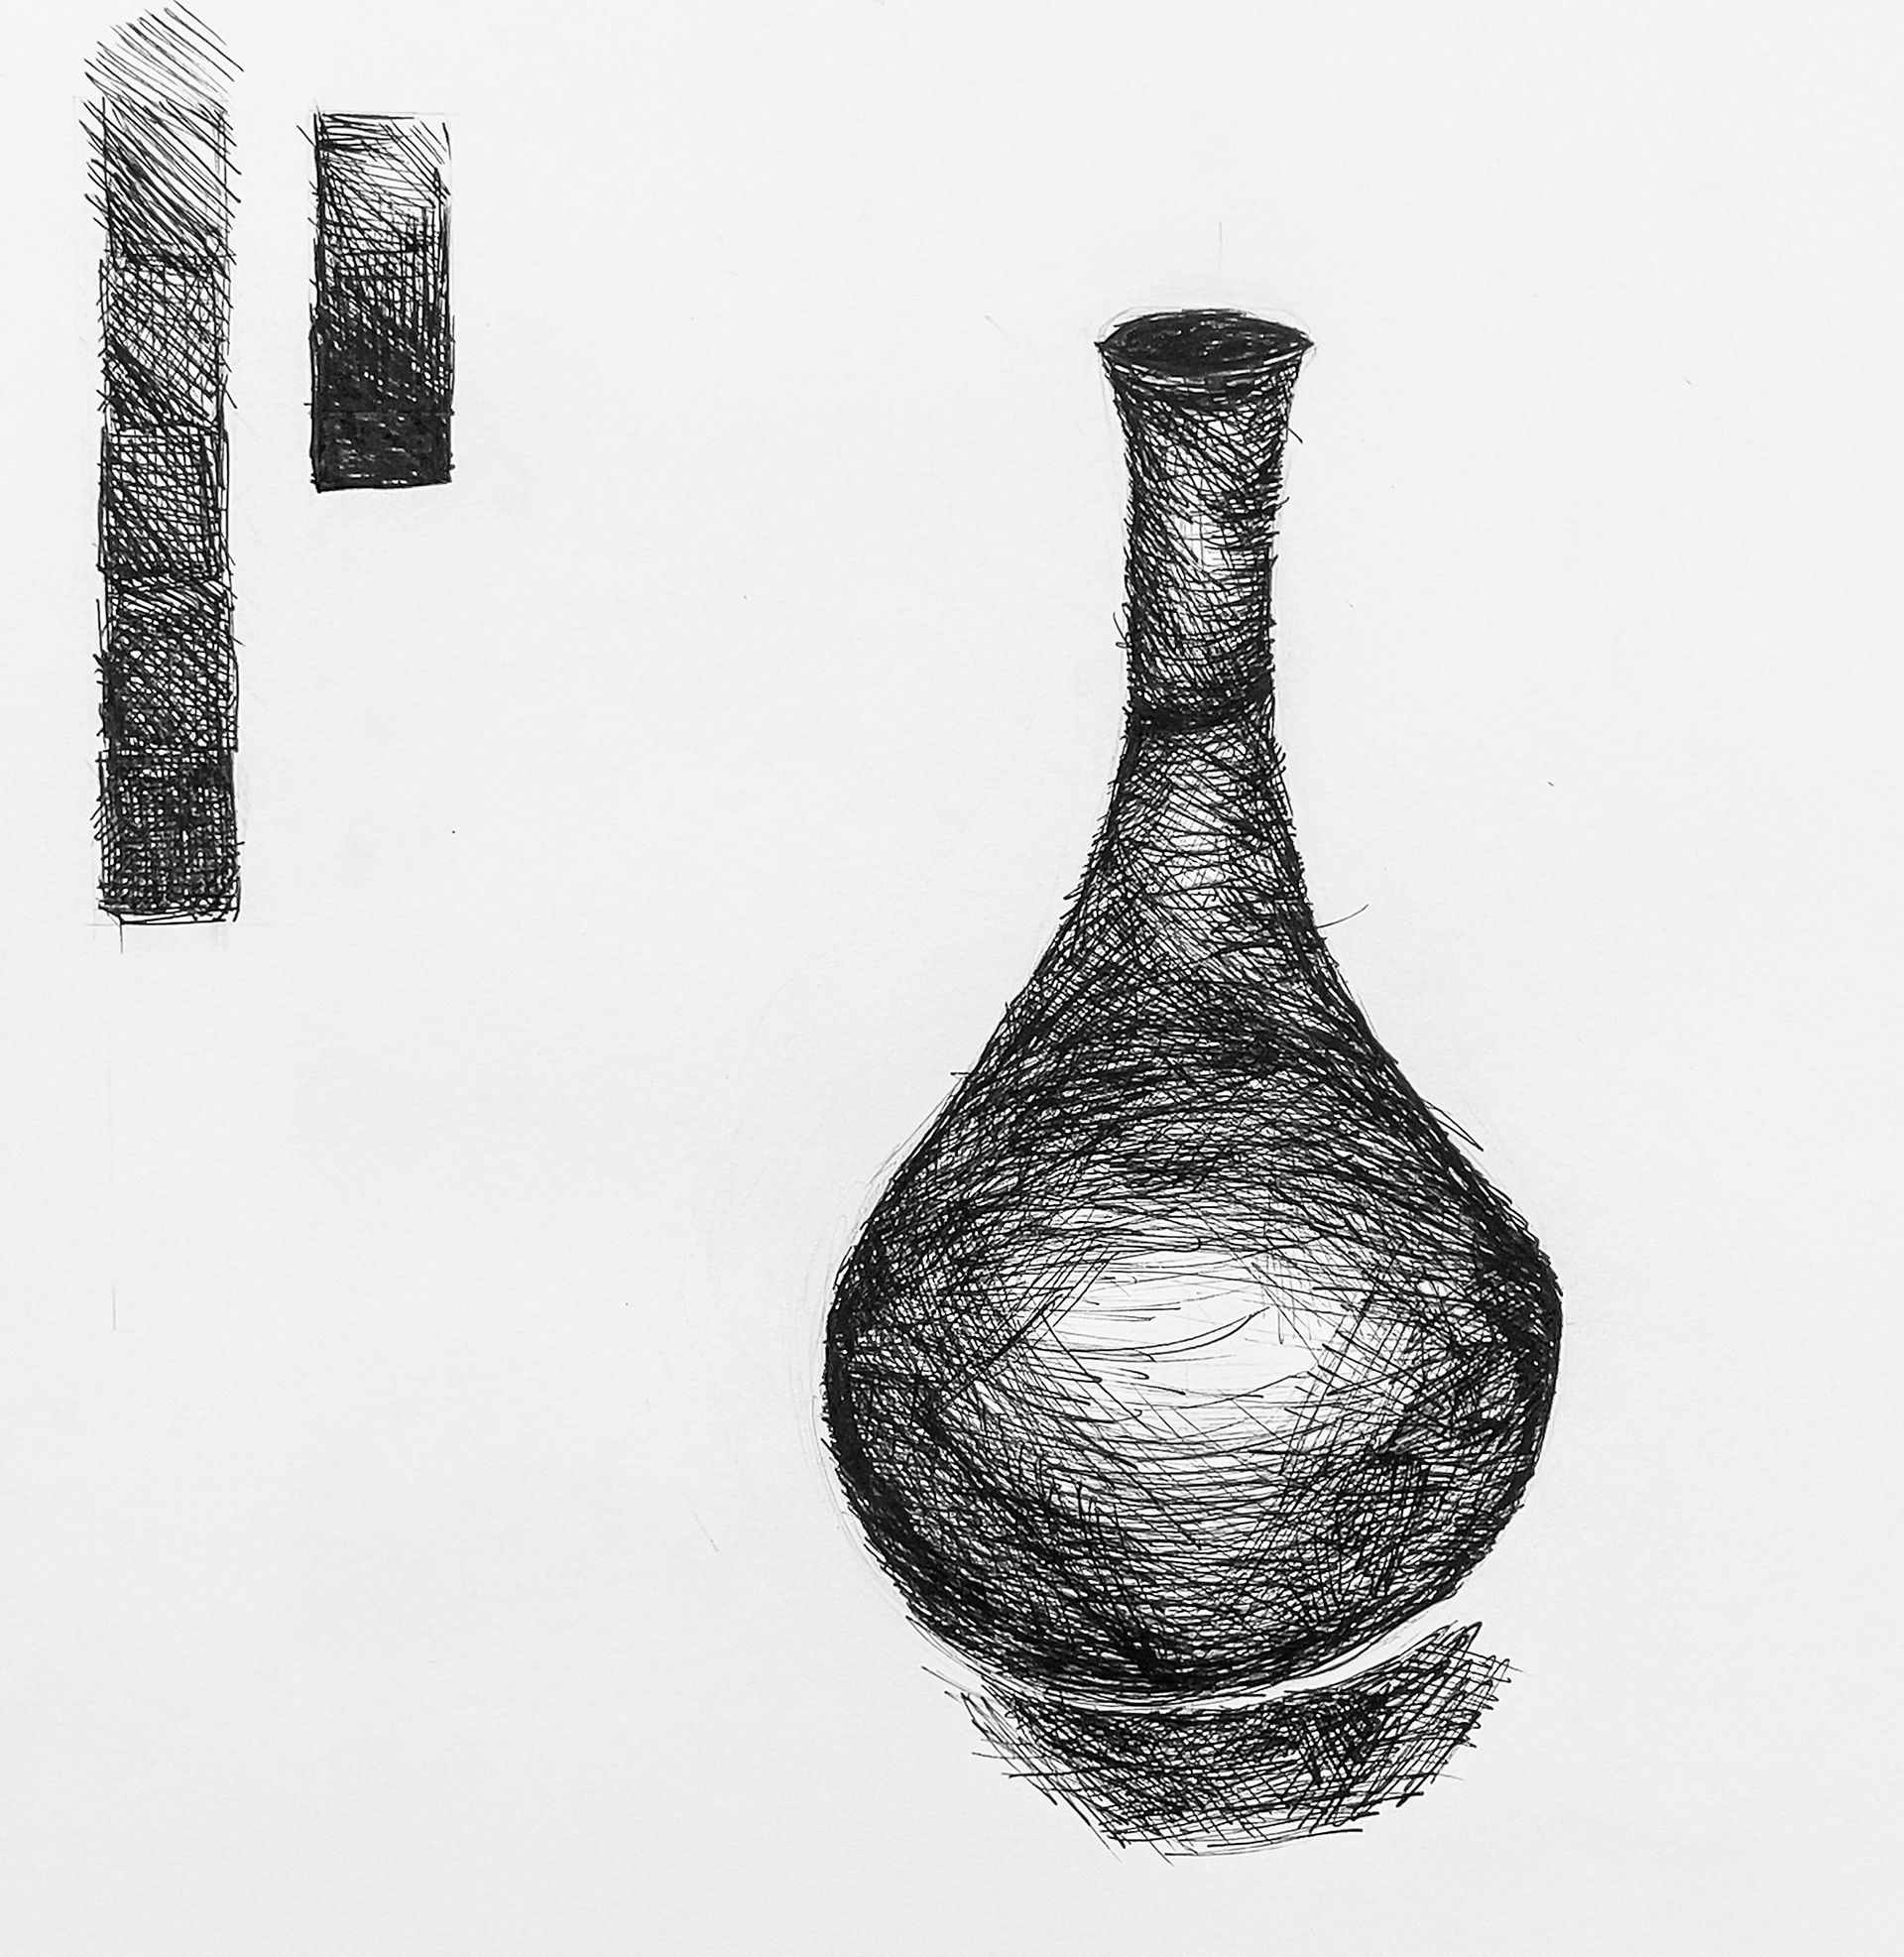
Examples of previous students' drawings:
What have they done well and what might they have improved on?

What tends to go wrong?
Here are the top 5 common beginner mistakes with cross-hatching, and some advice to avoid them:
Lines Too Uniform and Mechanical:
- Avoid stiff, identical lines. Vary length, spacing, and pressure to create natural, dynamic texture.
- Avoid stiff, identical lines. Vary length, spacing, and pressure to create natural, dynamic texture.
Not Following the Form or Light Source:
- Lines should follow the shape and consider where light hits. This adds volume and realistic shading.
- Lines should follow the shape and consider where light hits. This adds volume and realistic shading.
Uneven or Inconsistent Line Spacing:
- Practice even spacing to build smooth tones. Uneven gaps cause patchy shading.
- Practice even spacing to build smooth tones. Uneven gaps cause patchy shading.
Building Tone Too Quickly or Too Dark at Once:
- Layer gradually and build up tone step-by-step. Start light and add layers slowly for smooth transitions.
- Layer gradually and build up tone step-by-step. Start light and add layers slowly for smooth transitions.
Cross-Hatching Lines Always at the Same Angle:
- Vary the angle of crossing lines to avoid mechanical textures and create richer tonal depth.
- Vary the angle of crossing lines to avoid mechanical textures and create richer tonal depth.