Successful photography all boils down to light and how you control it. Follow through the PowerPoints below to gain an understanding of aperture and shutter speed in controlling exposure, depth of field and more.
Introduction to Exposure:
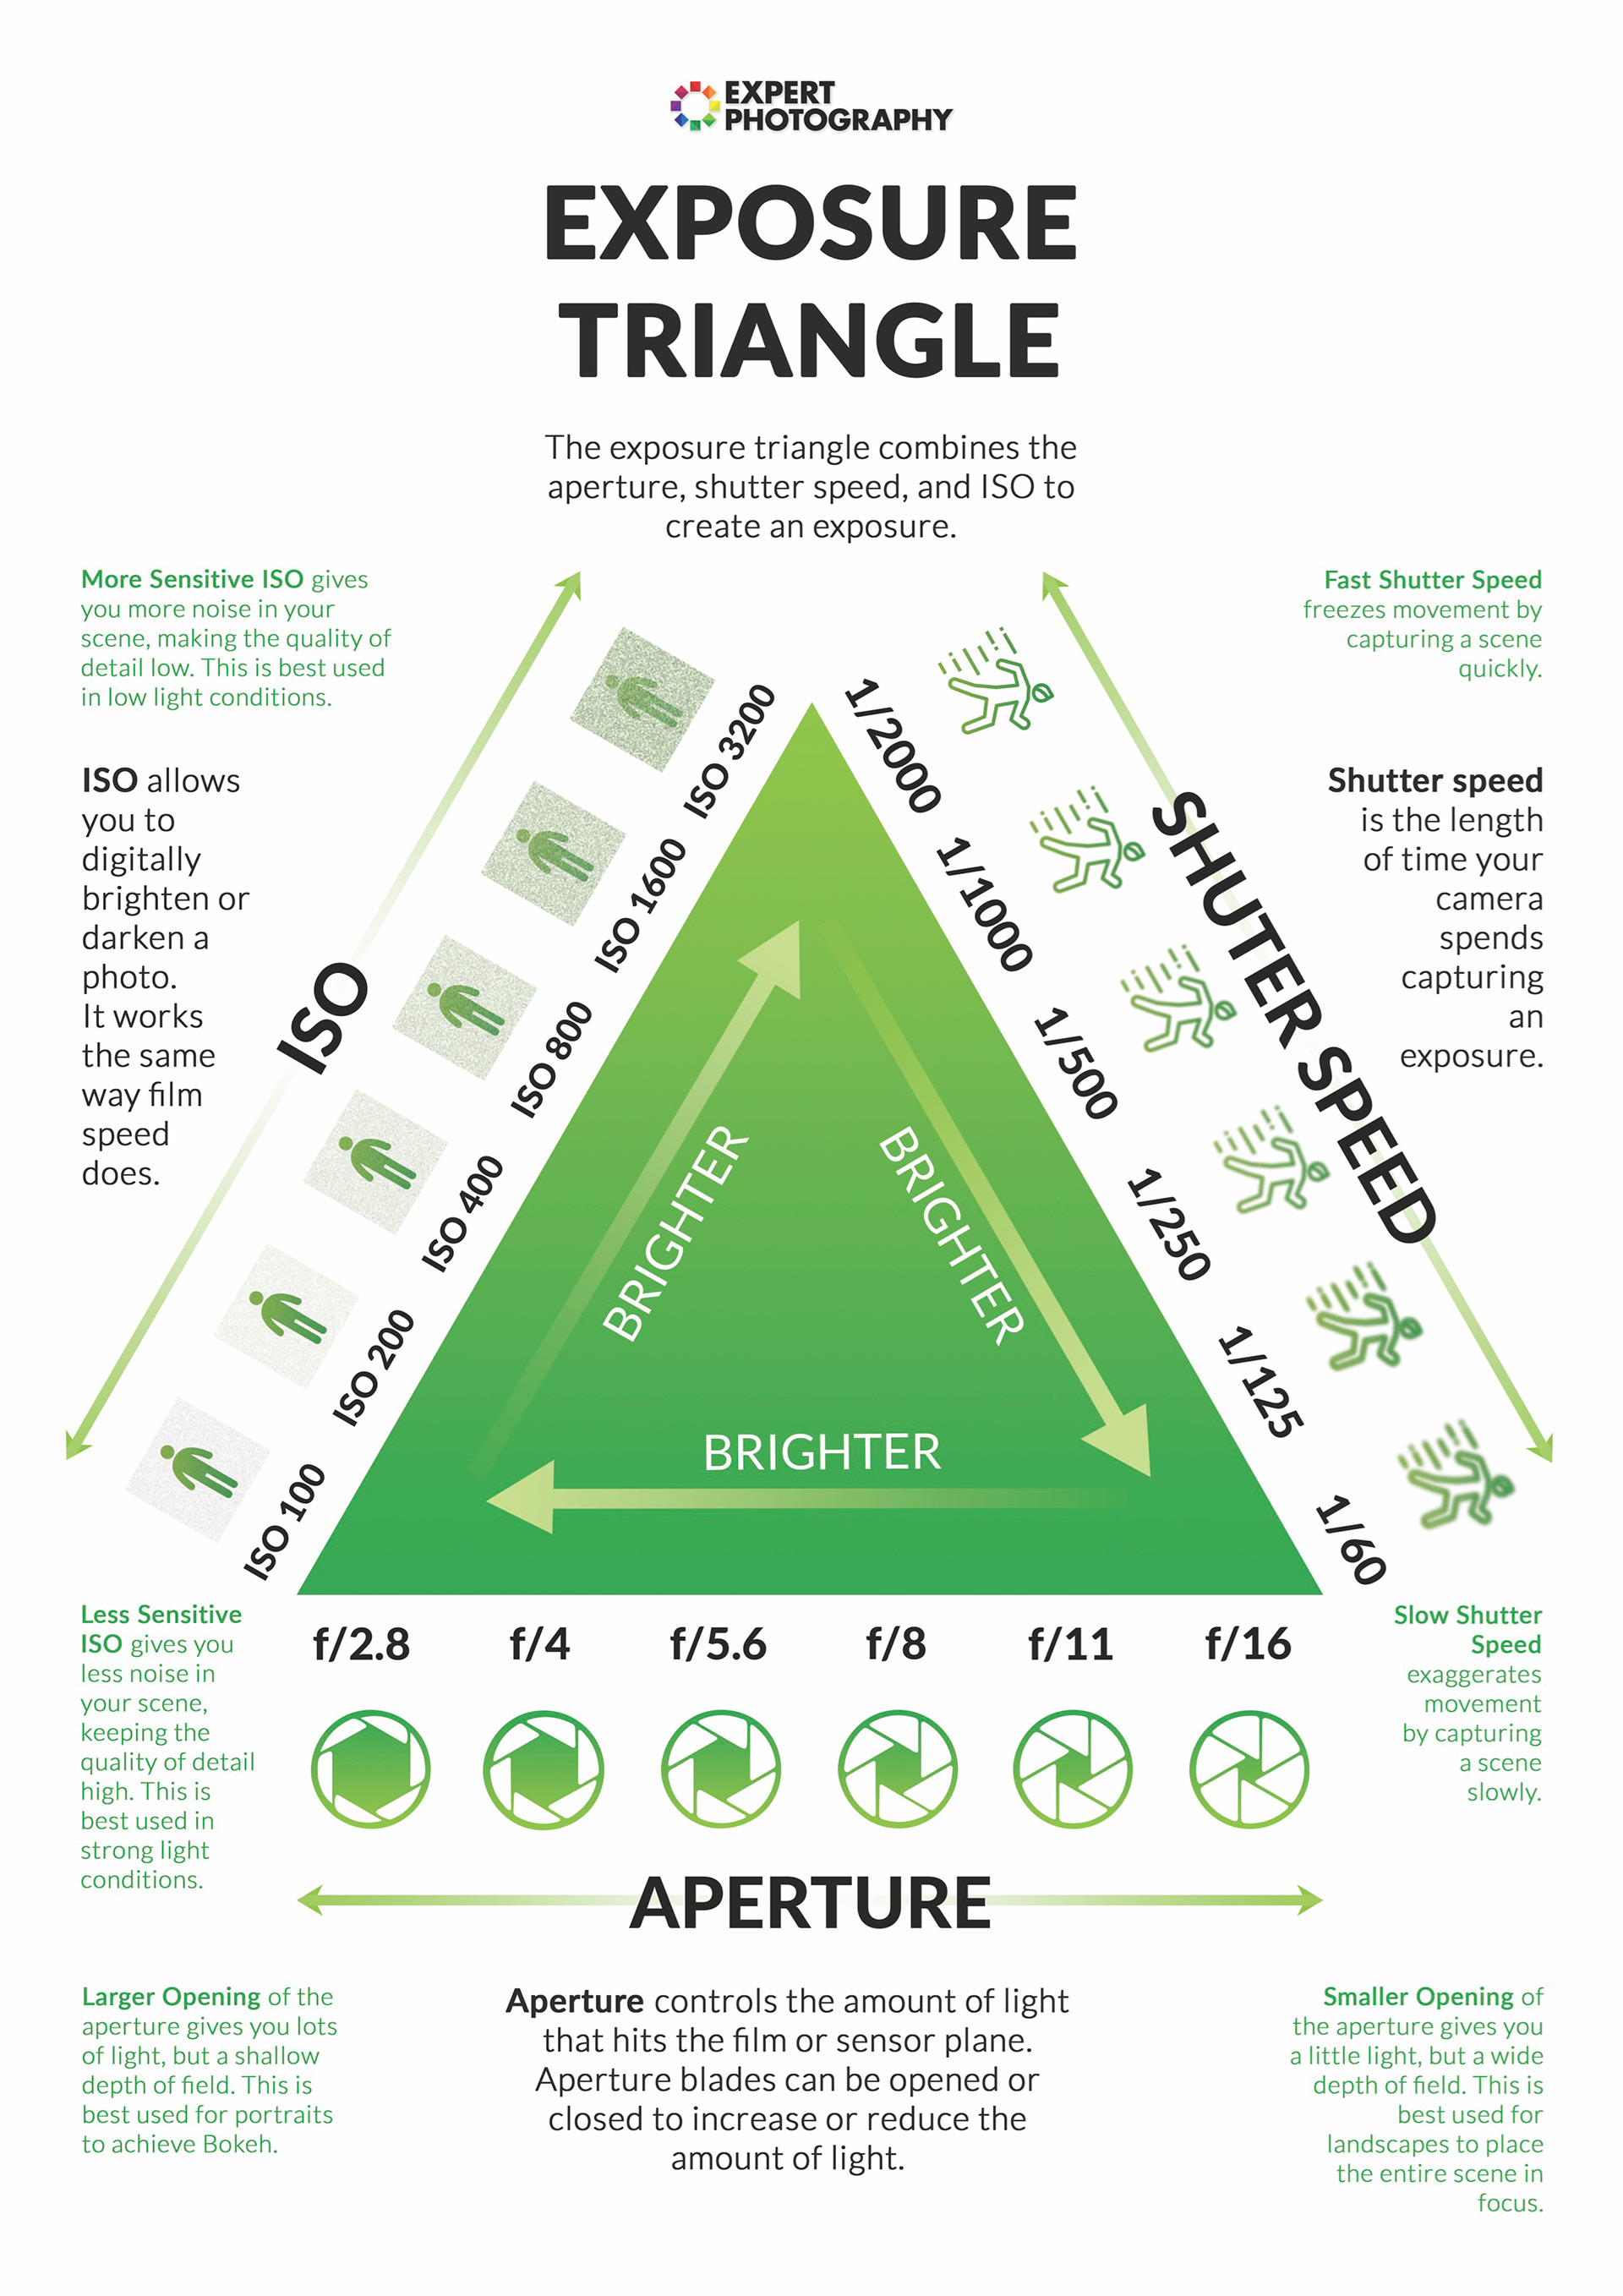
Exposure is essentially the amount of light that gets into the camera and hits the sensors (or film in traditional cameras). This PowerPoint explains how to control it.
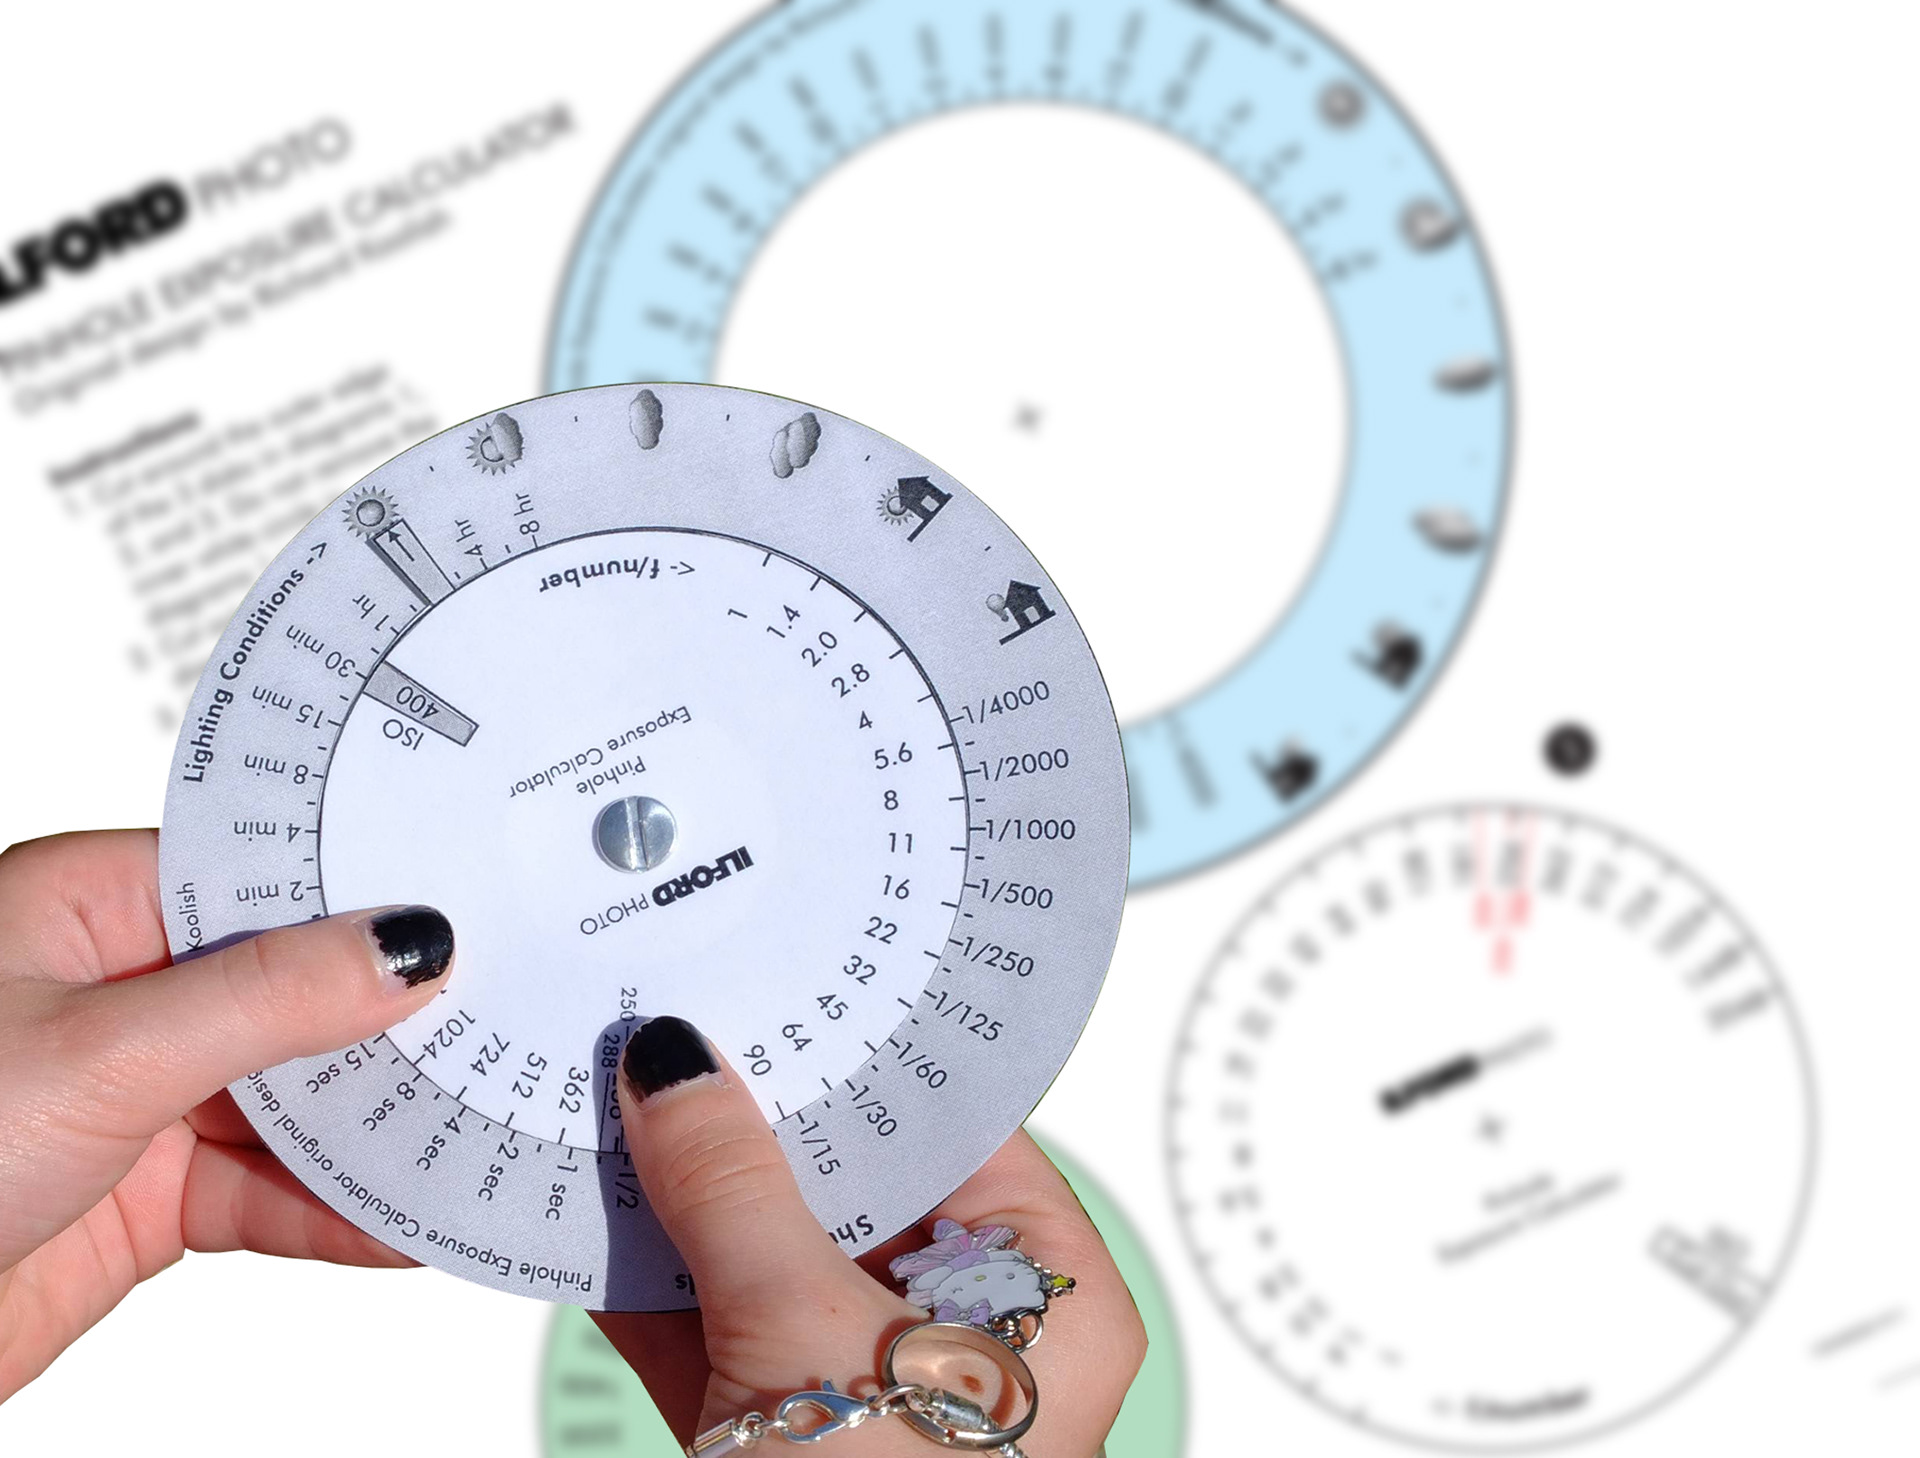
Download and construct your own exposure calculator:
Introduction to Depth of Field:
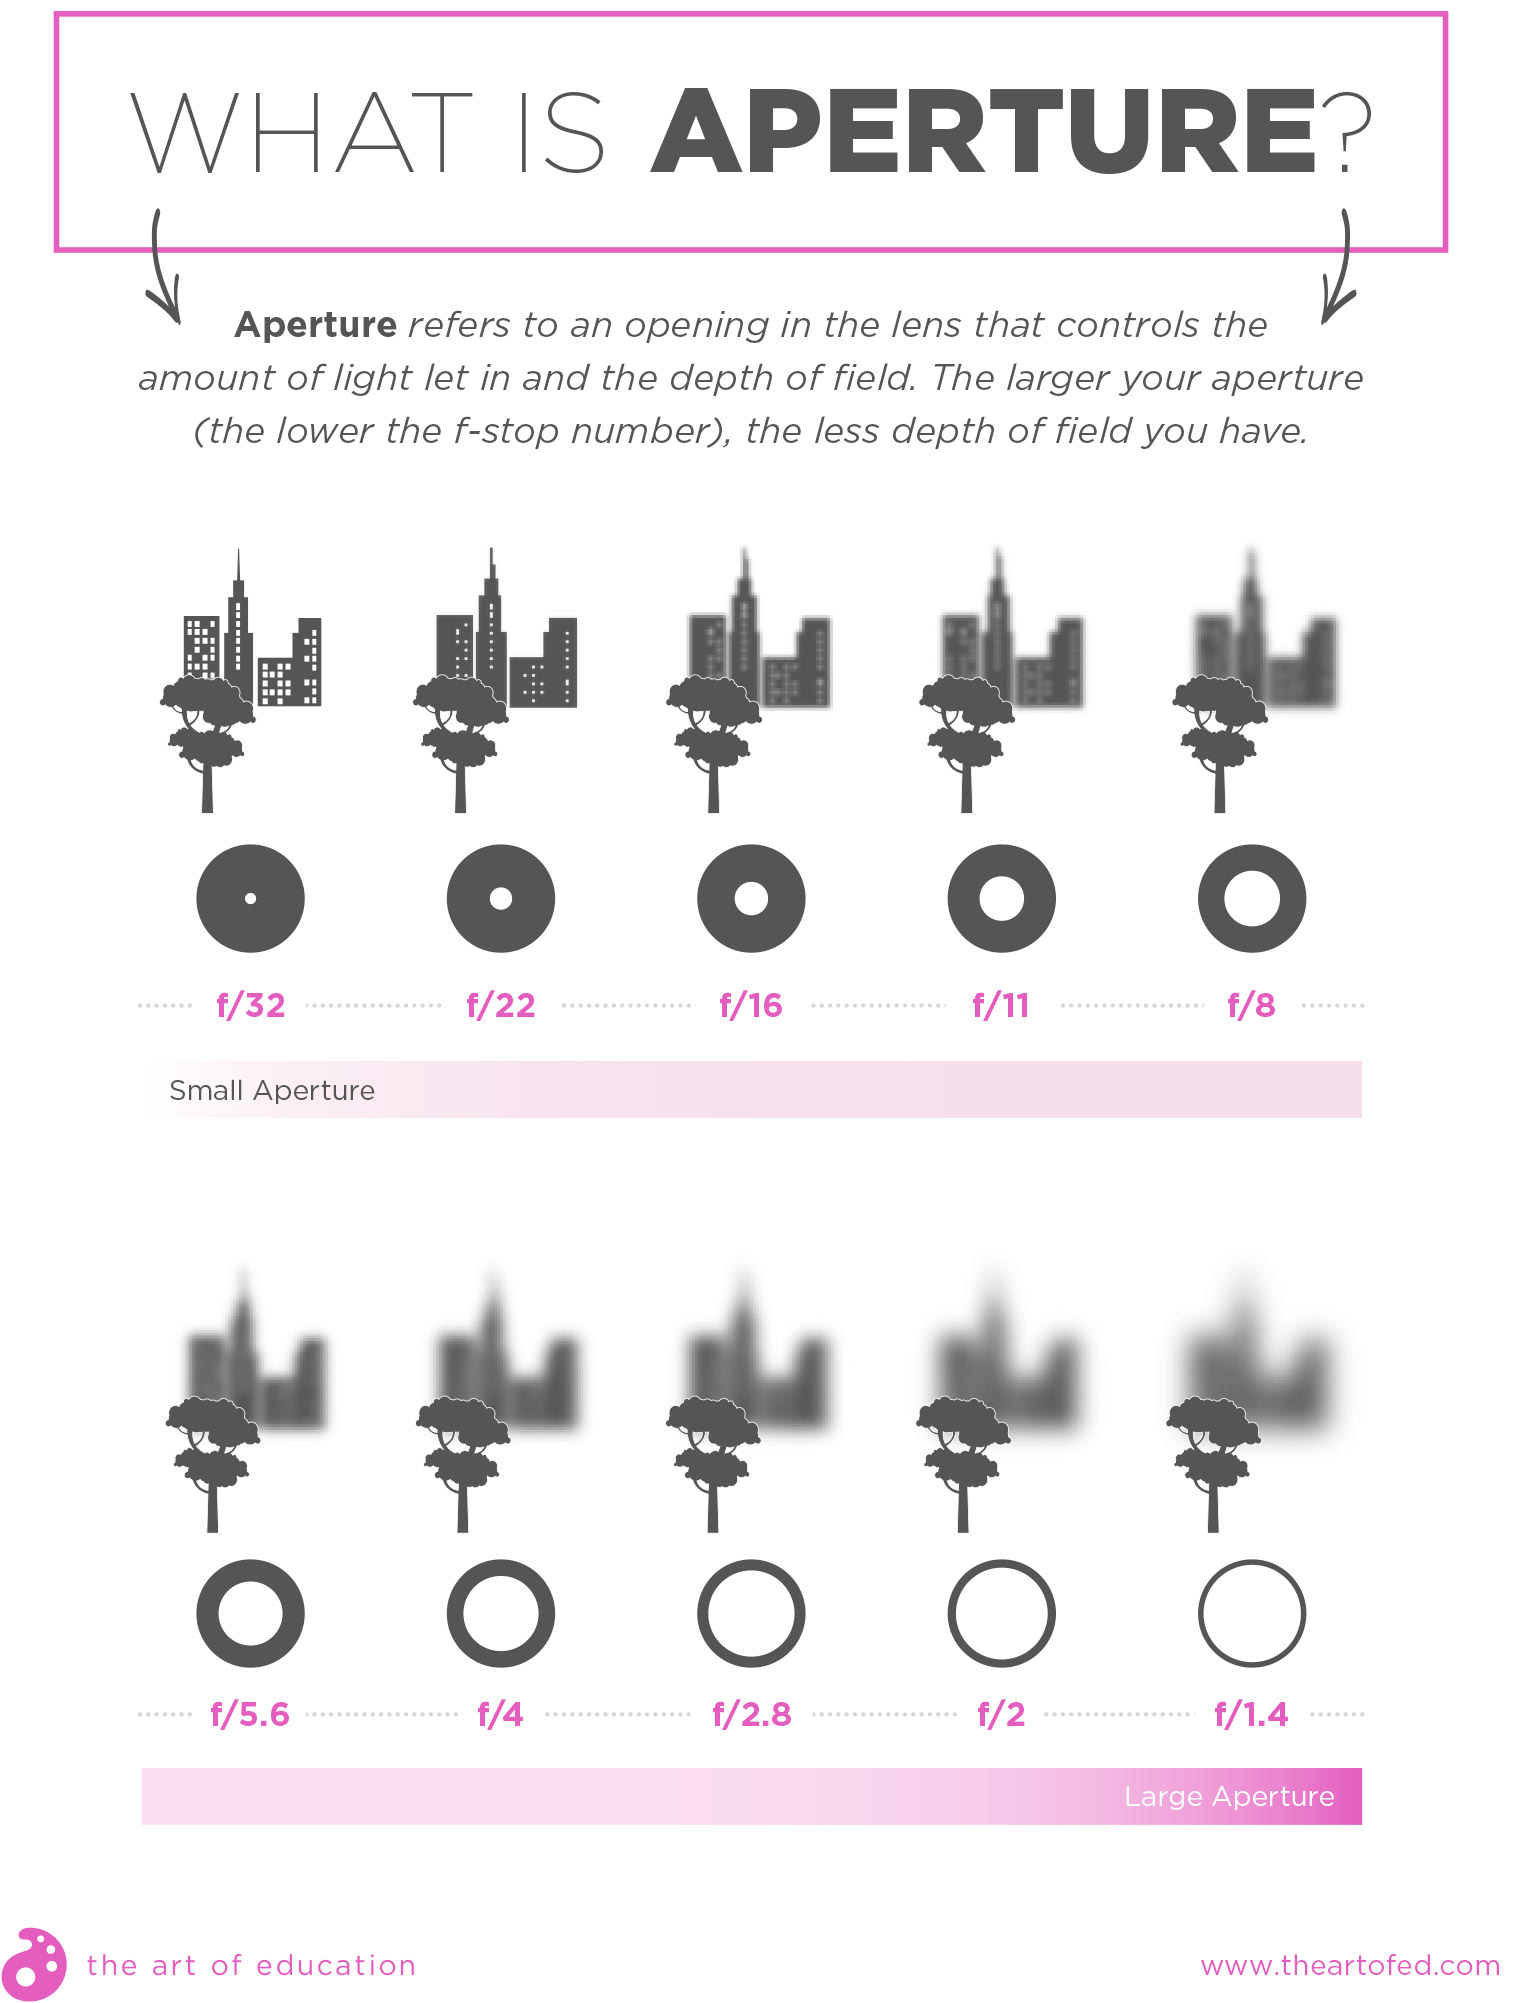
Depth of field is how much of an image is in focus as you look at objects that are closer to you or further away. It is not to be confused with motion blur. This PowerPoint explains how it is controlled using aperture, focal length and by altering the distance between the camera, the subject and the background.
Depth of Field Recap:
Understanding film speed (ISO):
Your camera sensor can be adjusted to be more or less sensitive to light. The higher the sensitivity (ISO), the more you can capture in low light without needing such a long shutter speed. But the consequence of using a higher sensitivity is that your pictures can look flat, colours can become duller and your images can appear grainy (especially in the shadows).
Generally, photographers try to use a low ISO where possible. But there are times when a higher ISO is required, so think of raising your ISO like 'borrowing more light'. This PowerPoint explains how film speed works.
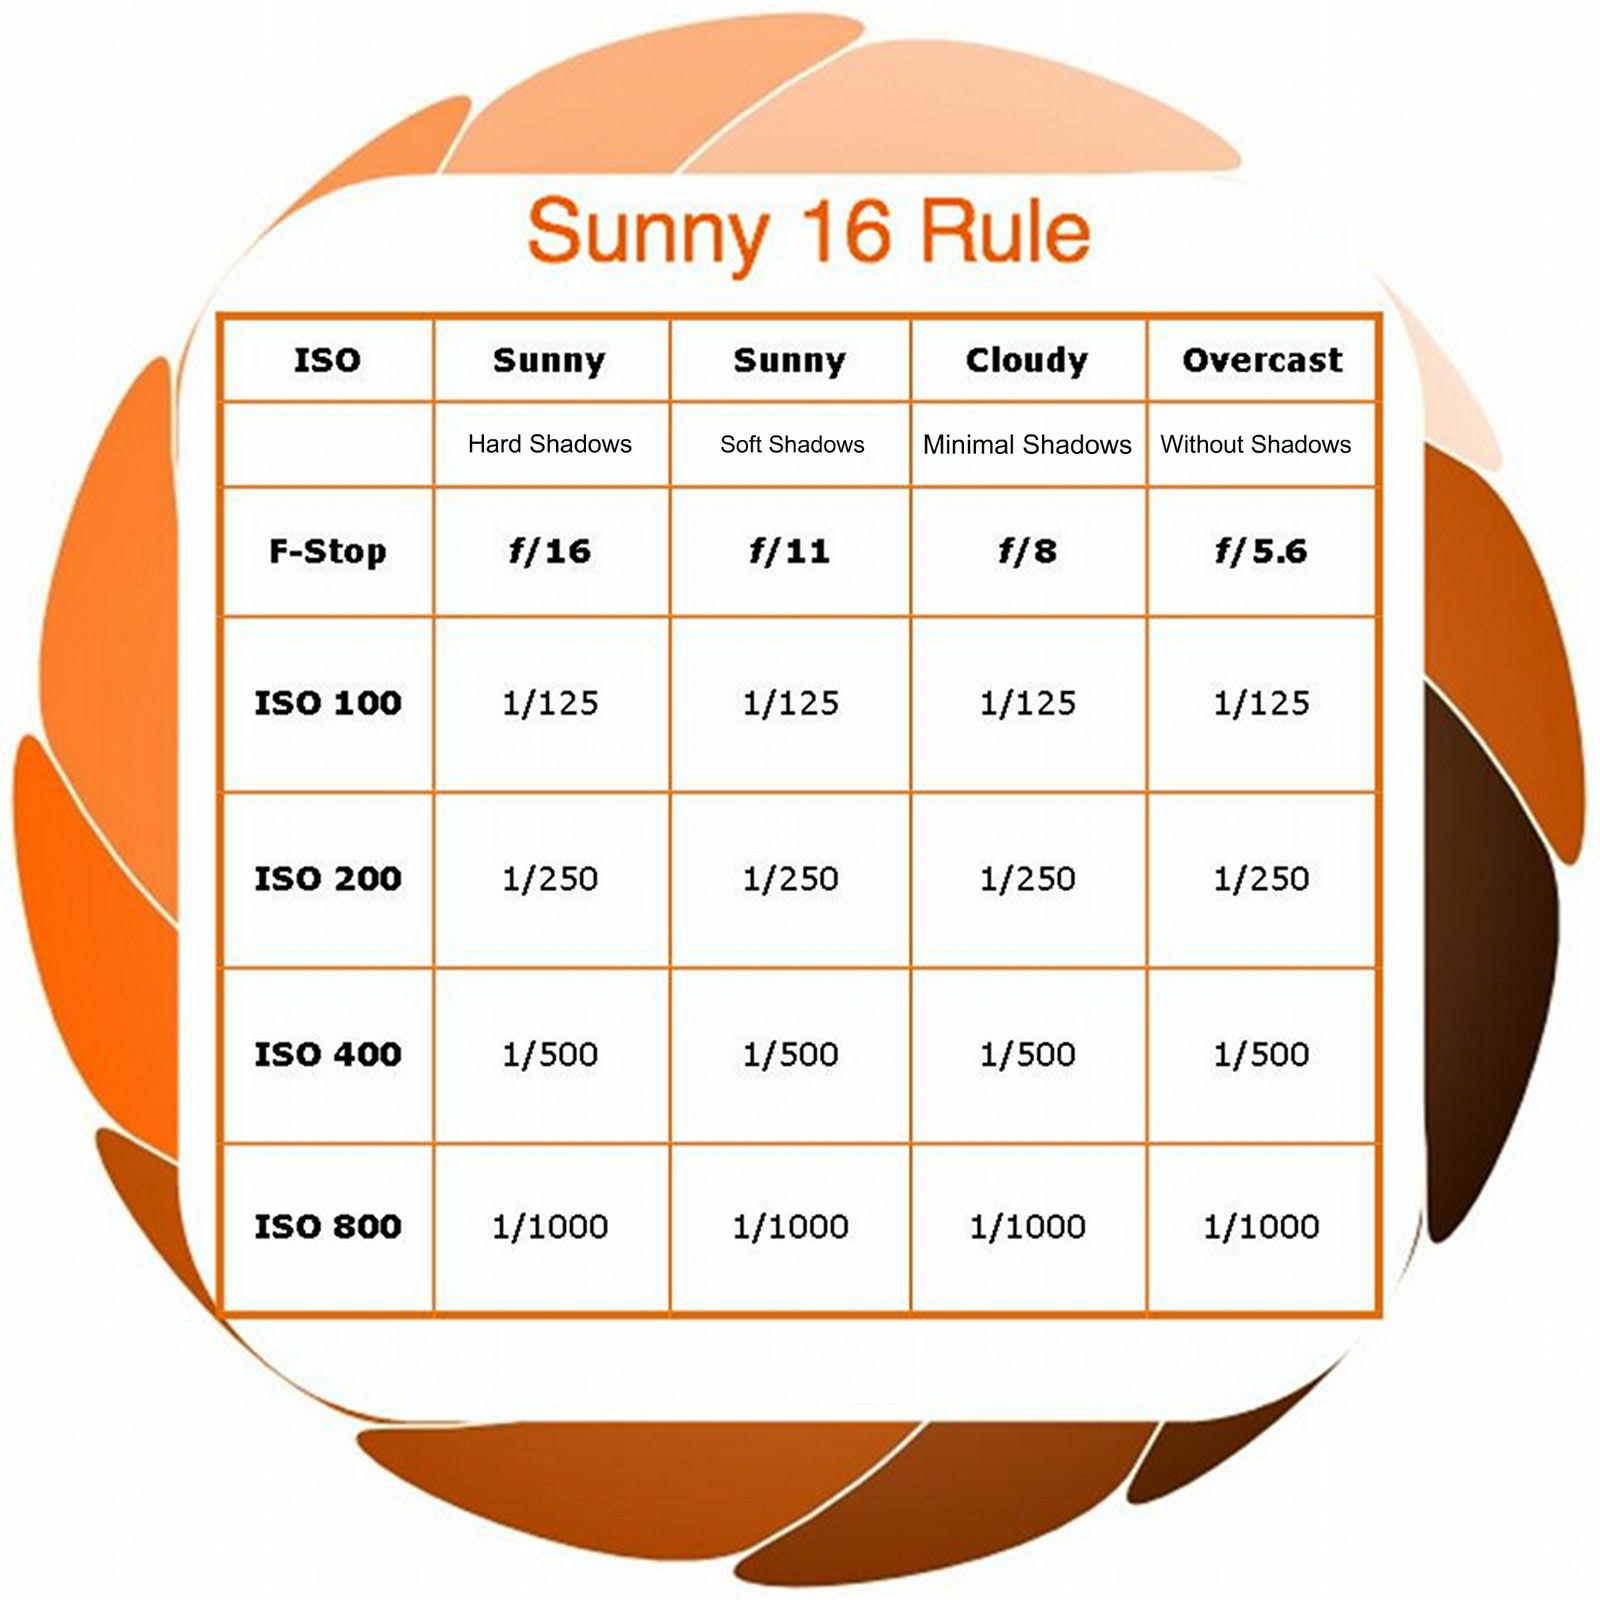
Sunny 16 Rule:
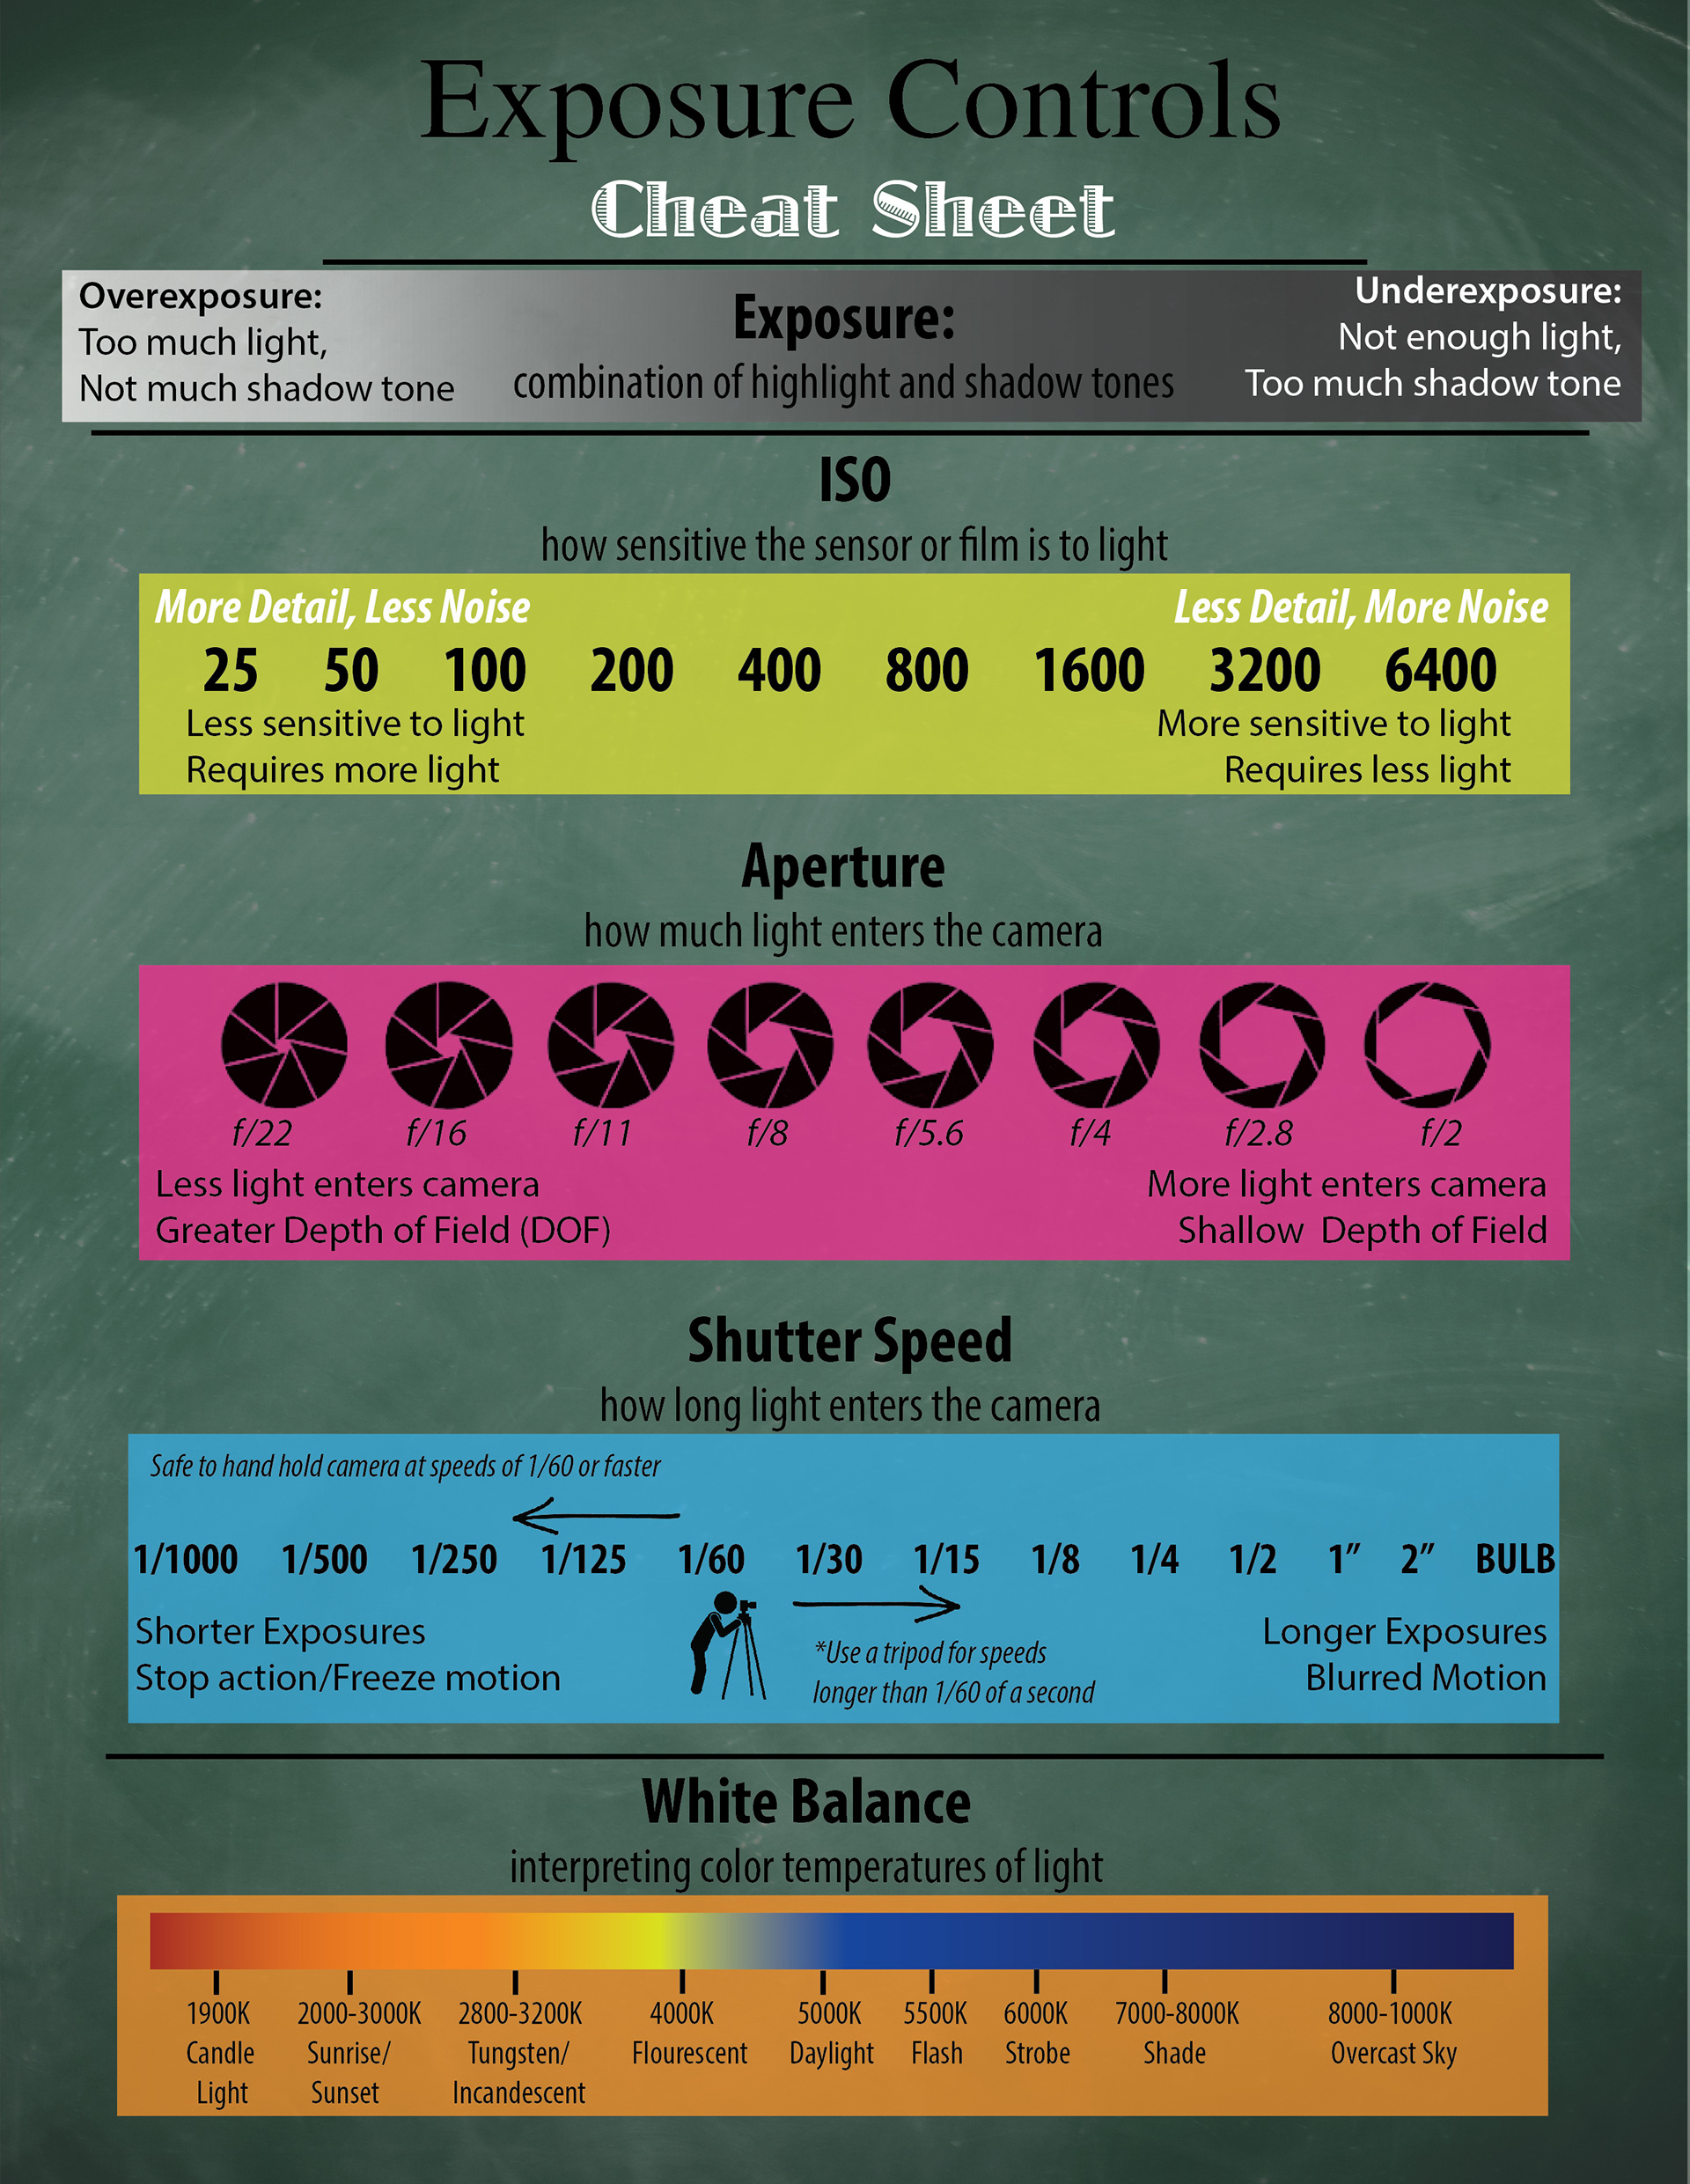
Cheat sheets:
Once you have gained a clear understanding of exposure, these quick guides work as a useful reminder so that you don't have to scroll back through the PowerPoints above each time you forget.

ADVANCED SKILL: Bracketing
Bracketing is when you set up your camera to toggle between three different exposures when you press the shutter release button: one underexposed, one overexposed and one in the middle.
If your camera is set to 'continuous shooting' mode, you can hold the shutter release button down and it will take the three shots in quick succession. You can then either choose between them when you get to your computer, or you can merge them together in post-processing.
The process of merging photos like this is known as High Dynamic Range (HDR) photography and it is used to maintain detail in both the shadows and highlights. You can learn more about this later.
The guide below explains bracketing in more detail but you may need to look at your camera manual to work out how to set it up on your own particular camera.